Dashboard
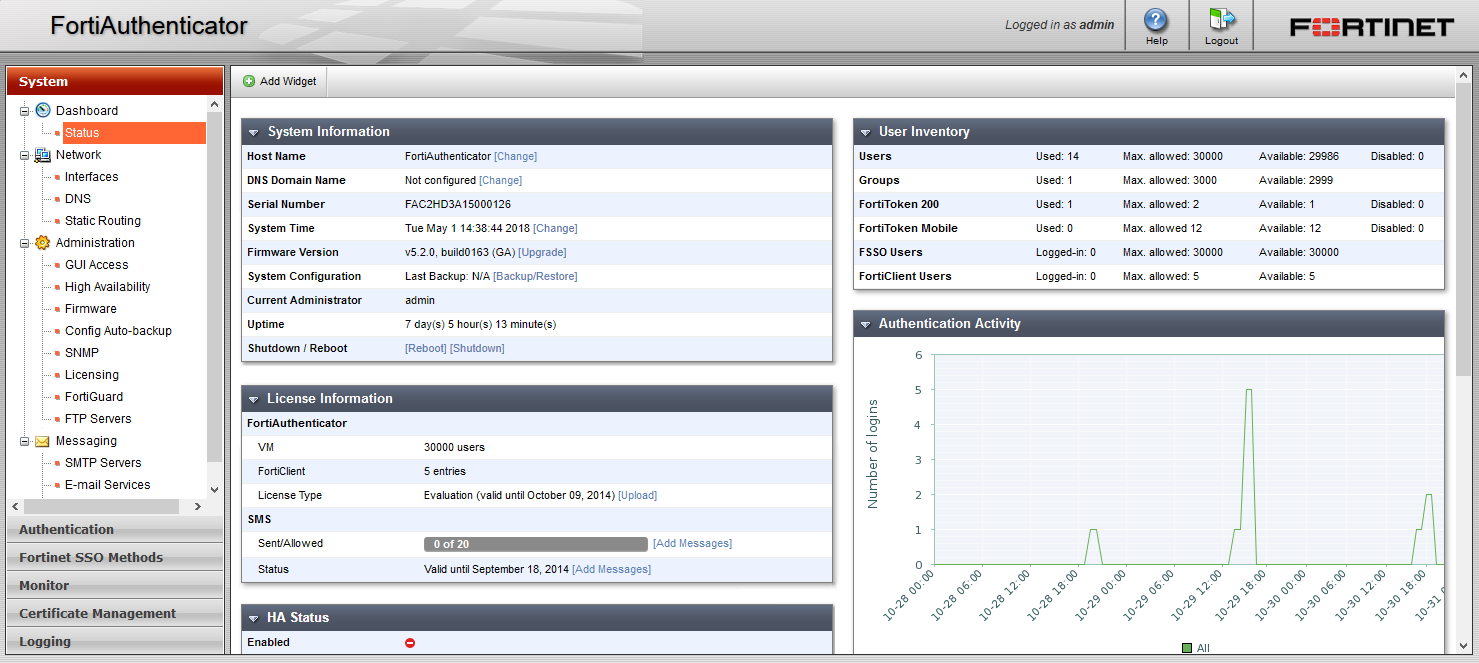
When you select the System tab, it automatically opens at the System > Dashboard > Status page.
The Dashboard page displays widgets that provide performance and status information, allowing you to configure some basic system settings. These widgets appear on a single dashboard.
The following widgets are available:
| System Information |
Displays basic information about the FortiAuthenticator system including host name, DNS domain name, serial number, system time, firmware version, architecture, system configuration, current administrator, and up time. From this widget you can manually update the FortiAuthenticator firmware to a different release. For more information, see System Information widget. |
| System Resources |
Displays the usage status of the CPU and memory. For more information, see System Resources widget. |
| Authentication Activity |
Displays a customizable graph of the number of logins to the device. For more information, see Authentication Activity widget. |
| User Inventory |
Displays the numbers of users, groups, FortiTokens, FSSO users, and FortiClient users currently used or logged in, as well as the maximum allowed number, the number still available, and the number that are disabled. For more information, see User Inventory widget. |
| HA Status |
Displays whether or not HA is enabled. |
| License Information |
Displays the device's license information, as well as SMS information. For more information, see License Information widget. |
| Disk Monitor |
Displays if RAID is enabled, and the current disk usage in GB. |
| Top User Lockouts |
Displays the top user lockouts. For more information, see Top User Lockouts widget. |
Customizing the dashboard
The FortiAuthenticator system settings dashboard is customizable. You can select which widgets to display, where they are located on the page, and whether they are minimized or maximized.
To move a widget
Position your mouse cursor on the widget’s title bar, then click and drag the widget to its new location.
To add a widget
In the dashboard toolbar, select Add Widget, then select the widget you want to show. Multiple widgets of the same type can be added. To hide a widget, in its title bar, select the Hide icon.
To see the available options for a widget
Position your mouse cursor over the icons in the widget’s title bar. Options include show/hide the widget, edit the widget, refresh the widget content, and close the widget.
The following table lists the widget options.
To change the widget title
Widget titles can be customized by selecting the edit button in the title bar and entering a new title in the widget settings dialog box. Some widgets have more options in their respective settings dialog box.
To reset a widget title to its default name, simply leave the Custom widget title field blank.
The widget refresh interval can also be manually adjusted from this dialog box.
System Information widget
The system dashboard includes a System Information widget, which displays the current status of the FortiAuthenticator unit and enables you to configure basic system settings.
The following information is available on this widget:
| Host Name | The identifying name assigned to this FortiAuthenticator unit. For more information, see Changing the host name. |
| Device FQDN | The FQDN domain name. For more information, see Changing the FQDN domain name. |
| Serial Number | The serial number of the FortiAuthenticator unit. The serial number is unique to the FortiAuthenticator unit and does not change with firmware upgrades. The serial number is used for identification when connecting to the FortiGuard server. |
| System Time | The current date, time, and time zone on the FortiAuthenticator internal clock or NTP servers. For more information, see Configuring the system date, time, and time zone. |
| Firmware Version | The version and build number of the firmware installed on the FortiAuthenticator unit. To update the firmware, you must download the latest version from the Customer Service & Support portal at https://support.fortinet.com. Select Upgrade and select the firmware image to load from your management computer. |
| System Configuration | The date of the last system configuration backup. Select Backup/Restore to backup or restore the system configuration. For more information, see Backing up and restoring the configuration. |
| Current Administrator | The name of the currently logged on administrator. |
| Uptime | The duration of time the FortiAuthenticator unit has been running since it was last started or restarted. |
| Shutdown / Reboot | Options to shutdown or reboot the device. When rebooting or shutting down the system, you have the option to enter a message that will be added to the event log explaining the reason for the shutdown or reboot. |
Changing the host name
The System Information widget will display the full host name.
To change the host name:
- Go to System > Dashboard > Status.
- In the System Information widget, in the Host Name field, select Change. The Edit Host Name page opens.
- In the Host name field, type a new host name.
|
|
The host name may be up to 35 characters in length. It may include US‑ASCII letters, numbers, hyphens, and underscores. Spaces and special characters are not allowed. |
- Select OK to save the setting.
Changing the FQDN domain name
To change the FQDN domain name:
- Go to System > Dashboard > Status.
- In the System Information widget, in the Device FQDN field, select Change. The Edit Device FQDN page opens.
- Type a domain name in the field.
- Select OK to save the setting.
The FQDN domain name identifies the exact location of this server in the DNS hierarchy.
Configuring the system date, time, and time zone
You can either manually set the FortiAuthenticator system date and time, or configure the FortiAuthenticator unit to automatically keep its system time correct by synchronizing with an NTP server.
|
|
For many features to work the FortiAuthenticator system time must be accurate. Synchronization with a NTP server is highly recommended. |
To configure the date and time:
- Go to System > Dashboard > Status.
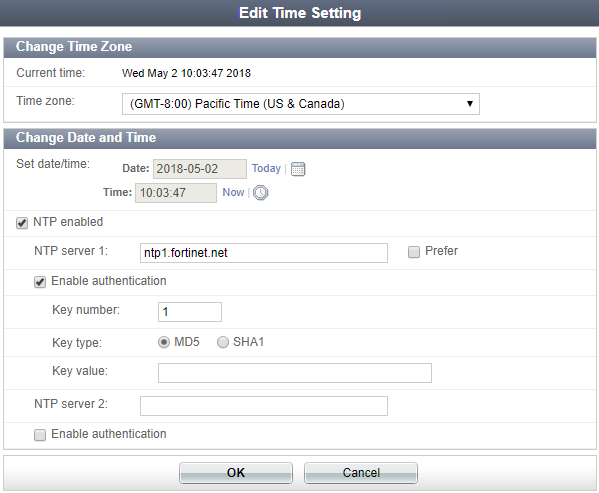
- In the System Information widget, in the System Time field, select Change. The Edit Time Setting dialog box appears.
|
|
Note that, since the release of FortiAuthenticator 4.2, you can now configure an additional NTP server. |
- Configure the following settings to either manually configure the system time, or to automatically synchronize the FortiAuthenticator unit’s clock with a NTP server:
- Select OK to apply your changes.
| Change Time Zone | ||
| Time zone |
Select a timezone from the dropdwn menu. |
|
| Change Date and Time |
|
|
| Set date/time |
Either select Today or the calendar icon to specify the date, and either Now or the clock icon to specify the time. |
|
| NTP enabled |
Enable this option to set an NTP server. Note that, if you configure both NTP servers, you can select the Prefer checkbox to make NTP server 1 the preferred server. The NTP server 1 is set to ntp1.fortinet.net by default. In addition, you can select Enable authentication for each NTP server configured and enter a key number, type, and the key value. |
|
Backing up and restoring the configuration
Fortinet recommends that you back up your FortiAuthenticator configuration to your management computer on a regular basis to ensure that, should the system fail, you can quickly get the system back to its original state with minimal effect to the network. You should also perform a back up after making any changes to the FortiAuthenticator configuration.
The backup file is encrypted to prevent tampering. This configuration file includes both the CLI and GUI configurations of the FortiAuthenticator unit, including users, user groups, FortiToken device list, authentication client list, LDAP directory tree, FSSO settings, remote LDAP, and certificates.
You can perform backups manually. Fortinet recommends backing up all configuration settings from your FortiAuthenticator unit before upgrading the FortiAuthenticator firmware.
Your FortiAuthenticator configuration can also be restored from a backup file on your management computer.
To backup or restore the FortiAuthenticator configuration:
- Go to System > Dashboard > Status.
- In the System Information widget, in the System Configuration field, select Backup/Restore. The Configuration Backup and Restore page opens.
- Select from the following settings:
- Select Cancel to return to the dashboard page.
|
|
When you restore the configuration from a backup file, any information changed since the backup will be lost. Any active sessions will be ended and must be restarted. You will have to log back in when the system reboots. |
|
|
Restoring a configuration is only possible from a backup file made on the same model running the same version of the operating system. |
|
|
If you are restoring a configuration on the master device in an HA cluster, shutdown the slave device until the master device is back online to ensure that the configuration synchronization occurs correctly. |
System Resources widget
The System Resources widget on the dashboard displays the usage status of the CPU and memory as a percentage.
Authentication Activity widget
The Authentication Activity widget displays a line graph of the number of logins versus time.
To adjust the data displayed in the graph, select the edit button to open the Authentication Activity Widget Settings dialog box.
The following settings are available:
User Inventory widget
The User Inventory widget displays the numbers of users, groups, FortiTokens, FSSO users, and FortiClient users currently used or logged in, as well as the maximum allowed number, the number still available, and the number that are disabled.
License Information widget
The License Information widget displays the device's license information, as well as SMS information. You can also add a license and more SMS messages.
To upload a new license file, select Upload in the License Type field, then browse to the license file on the management computer.
To add more SMS messages, select Add Messages from either the Sent/Allowed field or the Status field. In the Add Messages dialog box, enter the certificate number for the messages and then select OK to add the messages. You can also Refresh Messages.
Top User Lockouts widget
The Top User Lockouts widget displays the users who are locked out the most. For more information on user lockouts and for instruction on adjusting user lockout settings, see Lockouts.
To change the number of user lockouts displayed in the widget, select the edit icon and change the number in the Number of lockouts field (set to 5 by default).
Copyright © 2018 Fortinet, Inc. All Rights Reserved. | Terms of Service | Privacy Policy
