3. Go to Web Vulnerability Scan > Web Vulnerability Scan > Web Vulnerability Scan Policy.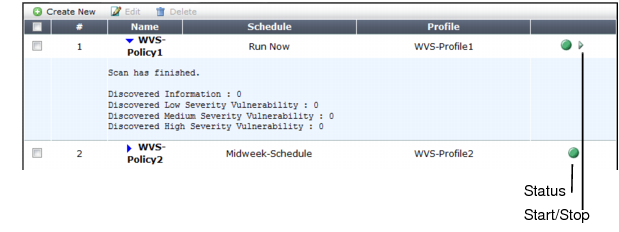
Field | Description |
Status | Indicates whether the scan is idle (the status indicator is solid green) or running (the status indicator is flashing red and yellow). |
Start/Stop | The Start/Stop icon appears only if the policy is configured as Run Now. If so, the icon changes depending on the current status of the scan: • Stop — The scan associated with the policy is in progress. • Start — The scan associated with the policy is not in progress. |
Setting name | Description |
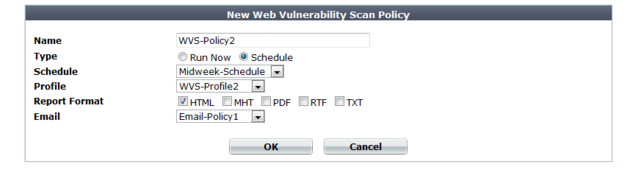
Name | Type a unique name that can be referenced in other parts of the configuration. Do not use spaces or special characters. The maximum length is 35 characters. |
Type | Select the scheduling type, either: • Run Now — The scan can be manually started at any time by the user. See “Manually starting & stopping a vulnerability scan”. |
Schedule | Select the predefined schedule to use for the scan. See “Scheduling web vulnerability scans”. This option appears only if the Type is Schedule. |
Profile | Select the profile to use when running the vulnerability scan. See “Configuring vulnerability scan settings”. |
Report Format | Enable one or more file formats for the vulnerability scan report: • HTML • MHT (MIME HTML, which can be included in email) • PDF • RTF (Rich Text Format, which can be opened in word processors such as OpenOffice or Microsoft Word) • TXT (plain text) |
Email | Select the email settings, if any, to use in order to send results of the vulnerability scan. See “Configuring email settings”. |