Uploading trusted CAs’ certificates
In order to authenticate other devices’ certificates, FortiWeb has a store of trusted CAs’ certificates. Until you upload at least one CA certificate, FortiWeb does not know and trust any CAs, it cannot validate any other client or device’s certificate, and all of those secure connections will fail.
Certificate authorities (CAs) validate and sign others’ certificates. When FortiWeb needs to know whether a client or device’s certificate is genuine, it will examine the CA’s signature, comparing it with the copy of the CA’s certificate that you have uploaded in order to determine if they were both made using the same private key. If they were, the CA’s signature is genuine, and therefore the client or device’s certificate is legitimate.
If the signing CA is not known, that CA’s own certificate must likewise be signed by one or more other intermediary CAs, until both the FortiWeb appliance and the client or device can demonstrate a signing chain that ultimately leads to a mutually trusted (shared “root”) CA that they have in common. Like a direct signature by a known CA, this proves that the certificate can be trusted. For information on how to include a signing chain, see
“How to offload or inspect HTTPS”“Uploading a server certificate”.
To upload a CA’s certificate
1. Obtain a copy of your CA’s certificate file.
If you are using a commercial CA, your web browser should already contain a copy in its CA trust store. Export a copy of the file to your desktop or other folder.
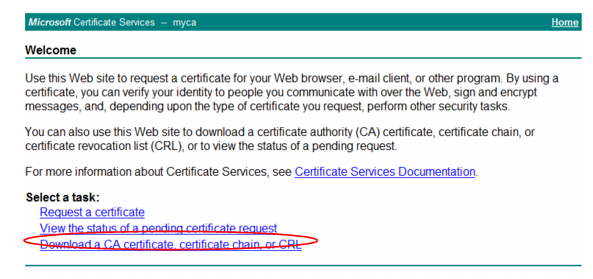
If you are using your own private CA, download a copy from your CA’s server. For example, on Windows Server 2003, you would go to:
https://<ca-server_ipv4>/certsrv/
where
<ca-server_ipv4> is the IP address of your CA server. Log in as
Administrator. (Other accounts may not have sufficient privileges.) The
Microsoft Certificate Services home page for your server’s CA should appear.
| Verify that your private CA’s certificate does not contain its private keys. Disclosure of private keys compromises the security of your network, and will require you to revoke and regenerate all certificates signed by that CA. |
2. Go to System > Certificates > CA.
You can click View Certificate Detail to view the selected certificate’s subject, range of dates within which the certificate is valid, version number, serial number, and extensions.
To access this part of the web UI, your administrator's account access profile must have
Read and
Write permission to items in the
Admin Users category. For details, see
“Permissions”.
3. To upload a certificate, click Import.
A dialog appears.
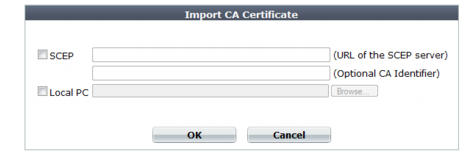
4. To select a certificate, either:
• Enable SCEP and in the field to the right of it, type the URL of the applicable Simple Certificate Enrollment Protocol server. (SCEP allows routers and other intermediary network devices to obtain certificates.)
To specify a specific CA, type an identifier in the field below the URL.
• Enable Local PC and browse to find a certificate file.
5. Click OK.
6. To use the CA certificate when validating clients’ personal certificates, select it in a CA certificate group, which is then selected in a certificate verification rule (see
“Grouping trusted CAs’ certificates”).
If the query fails, verify that your CA is the same one that signed the LDAP server’s certificate, and that its certificate’s extensions indicate that the certificate can be used to sign other certificates. Verify that both the appliance and LDAP server support the same cipher suites and SSL/TLS protocols. Also verify that your routers and firewalls are configured to allow the connection.
See also