Blacklisting & whitelisting clients using a source IP or source IP range
You can define which source IP addresses are trusted clients, undetermined, or distrusted.
• Trusted IPs — Almost always allowed to access to your protected web servers. Trusted IPs are exempt from many (but not all) of the restrictions that would otherwise be applied by a server policy. For a list of skipped scans, see
“Sequence of scans”.
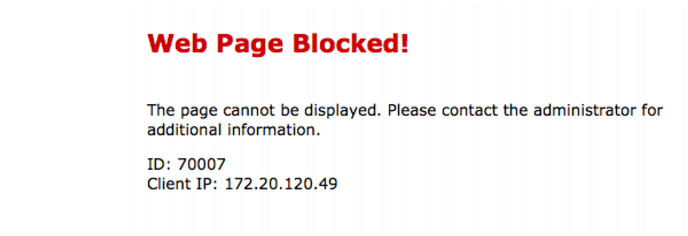
• Blacklisted IPs — Blocked and prevented from accessing your protected web servers. Requests from blacklisted IP addresses receive a warning message as the HTTP response. The warning message page includes ID: 70007, which is the ID of all attack log messages about requests from blacklisted IPs.
If a source IP address
is neither explicitly blacklisted or trusted by an IP list policy, the client can access your web servers,
unless it is blocked by any of your other configured, subsequent web protection scan techniques (see
“Sequence of scans”).
Because many businesses, universities, and even now home networks use NAT, a packet’s source IP address may not necessarily match that of the client. Keep in mind that if you black list or white list an individual source IP, it may therefore inadvertently affect other clients that share the same IP.
| Because trusted and blacklisted IP policies are evaluated before many other techniques, defining these IP addresses can be used to improve performance. For details, see “Sequence of scans”. |
To configure policies for individual source IPs
1. If you want to use a trigger to create a log message and/or alert email when a blacklisted client attempts to connect to your web servers, configure the trigger first. See
“Configuring triggers”.
2. Go to Web Protection> Access > IP List.
To access this part of the web UI, your administrator’s account access profile must have
Read and
Write permission to items in the
Web Protection Configuration category. For details, see
“Permissions”.
3. Click Create New.
A dialog appears.
4. In Name, type a unique name that can be referenced by other parts of the configuration. Do not use spaces or special characters. The maximum length is 35 characters.
5. Click OK.
6. Click Create New to add an entry to the set.
A dialog appears.
7. Configure these settings:
Setting name | Description |
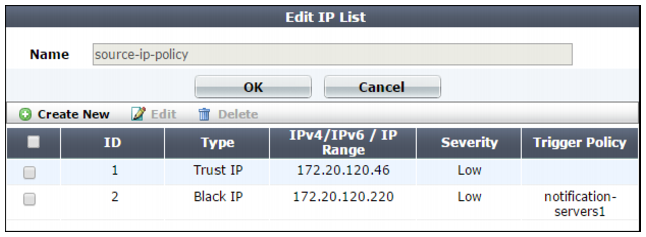
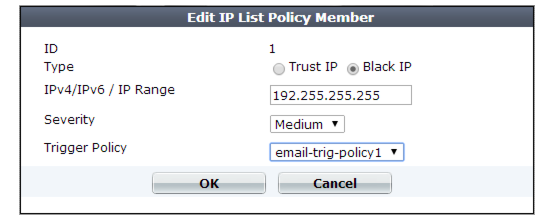
Type | Select either: • Trust IP — The source IP address is trusted and allowed to access your web servers, unless it fails a previous scan (see “Sequence of scans”). • Black IP — The source IP address that is distrusted, and is permanently blocked (blacklisted) from accessing your web servers, even if it would normally pass all other scans. Note: If multiple clients share the same source IP address, such as when a group of clients is behind a firewall or router performing network address translation (NAT), blacklisting the source IP address could block innocent clients that share the same source IP address with an offending client. |
IPv4/IPv6 / IP Range | Type the client’s source IP address. You can enter either a single IP address or a range or addresses (e.g., 172.22.14.1-172.22.14.255 or 10:200::10:1-10:200:10:100). |
Severity | When rule violations are recorded in the attack log, each log message contains a Severity Level (severity_level) field. Select which severity level the FortiWeb appliance will use when a blacklisted IP address attempts to connect to your web servers: • Low • Medium • High |
Trigger Action | Select which trigger, if any, that the FortiWeb appliance will use when it logs and/or sends an alert email about a blacklisted IP address’s attempt to connect to your web servers. See “Configuring triggers”. |
8. Click OK.
9. Repeat the previous steps for each individual IP list member that you want to add to the IP list.
Attack log messages contain Blacklisted IP blocked when this feature detects a blacklisted source IP address.
See also