Displaying & arranging log columns
When viewing logs in Formatted view, you can show, hide and re-order most columns to display only relevant categories of information in your preferred order.
| You cannot hide the Packet Log or Detail columns in the attack log and traffic log. |
For most columns, you can also filter data within the columns to include or exclude log messages which contain your specified text in that column. For more information, see
“Filtering log messages”.
To display or hide columns
1. Go to one of the log types, such as Log&Report > Log Access > Event.
To access this part of the web UI, your administrator’s account access profile must have
Read and
Write permission to items in the
Log & Report category. For details, see
“Permissions”.
2. Click the Column Settings icon.
Lists of available and displayed columns appear.
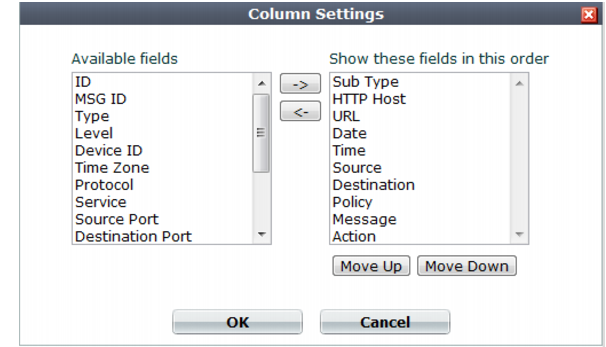
3. Select which columns to hide or display:
• In the Available fields area, select the names of individual columns you want to display, then click the single right arrow to move them to the Show these fields in this order area.
• In the Show these fields in this order area, select the names of individual columns you want to hide, then click the single left arrow to move them to the Available fields area.
4. Change the order of the columns:
• In the Show these fields in this order area, select a column name whose order of appearance you want to change.
• Click Move Up or Move Down to move the column in the ordered list.
Placing a column name towards the top of the Show these fields in this order list will move the column to the left side of the Formatted log view.
5. Click OK.
The page refreshes, displaying the columns that you selected, in the order that you specified. Column settings persist when changing pages or logging out, and apply to all administrator accounts with access to the page.
See also