Add report template content
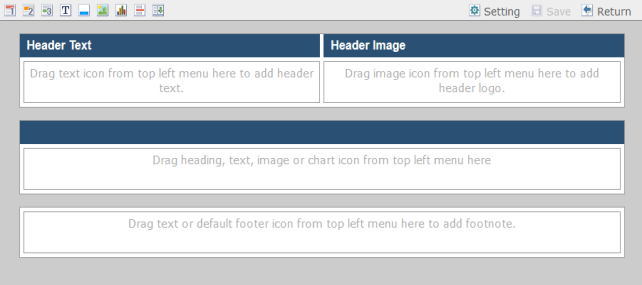
Various content can be added to a report template, such as charts, images, and typographic elements, using the section and template toolbars.
To add a section to a report template:
1. Go to the Reports tab and select the report from the tree menu to which you would like to add content.
2. Select Go To Template in the right-click menu to display the report template.
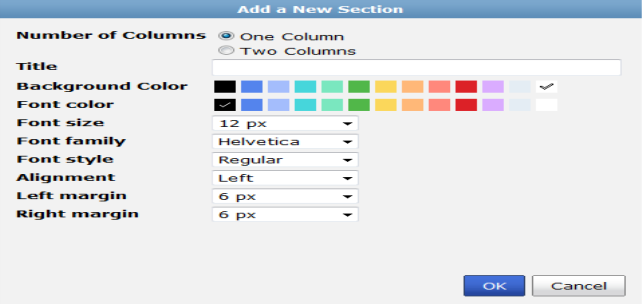
3. From the section toolbar, select the Add icon.
The Add a New Section dialog box opens.
4. Configure the following settings:
Number of Columns | Select to display either one or two columns. |
Title | Enter the section title. |
Background Color | Select the background color from the palette. |
Font color | Select the font color from the palette. |
Font size | Enter the font size. The default is 12 px. |
Font family | Select one of the following: Courier, Helvetica, Times, SimSun, SimHei, MingLiu, MS-Gothic, MS-PGothic, MS-Mincyo, MS-PMincyo, DotumChe, Dotum, BatangChe, or Batang. |
Font style | Select one of the following: Regular, Bold, Italic, or Bold and Italic. |
Alignment | Select one of the following: Left, Center, or Right. |
Left margin | Select the left margin value from the drop-down list. |
Right margin | Select the right margin value from the drop-down list. |
5. Select OK to create the new section.
6. If you are finished editing the template, select Save in the template toolbar to save your changes.
7. Select Return in the toolbar to return to Create Report page.
To edit a section in a report template:
1. Go to the Reports tab and select the report from the tree menu to which you would like to edit.
2. Select Go To Template in the right-click menu to display the report template.
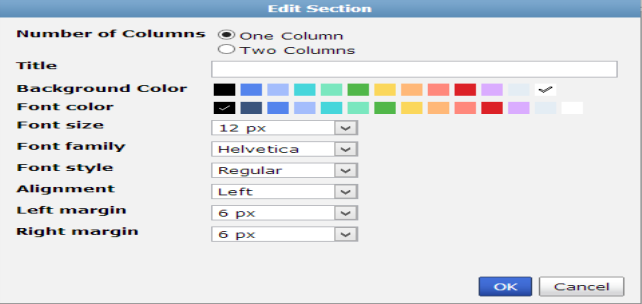
3. From the section toolbar, select the Edit Section icon.
The Edit Section dialog box opens.
4. Configure the following settings:
Number of Columns | Select to display either one or two columns. |
Title | Enter the section title. |
Background Color | Select the background color from the palette. |
Font color | Select the font color from the palette. |
Font size | Enter the font size. The default is 12 px. |
Font family | Select one of the following: Courier, Helvetica, Times, SimSun, SimHei, MingLiu, MS-Gothic, MS-PGothic, MS-Mincyo, MS-PMincyo, DotumChe, Dotum, BatangChe, or Batang. |
Font style | Select one of the following: Regular, Bold, Italic, or Bold and Italic. |
Alignment | Select one of the following: Left, Center, or Right. |
Left margin | Select the left margin value from the drop-down list. |
Right margin | Select the right margin value from the drop-down list. |
5. Select OK to create the new section.
6. If you are finished editing the template, select Save in the template toolbar to save your changes.
7. Select Return in the toolbar to return to Create Report page.
To add header text to the report template:
1. Go to the Reports tab and select the report from the tree menu to which you would like to add a default header.
2. Select Go To Template in the right-click menu to display the report template.
3. Click and drag the text icon to the report header text field.
| The header text and header image will print the cover page information including the device hostname in the report header when selecting not to print the report cover page in Language & Print Options. |
4. If you are finished editing the template, select Save in the template toolbar to save your changes.
5. Select Return in the toolbar to return to Create Report page.
To add a default footer to report template footer:
1. Go to the Reports tab and select the report from the tree menu to which you would like to add a default header.
2. Select Go To Template in the right-click menu to display the report template.
3. Click and drag the default footer icon to the report footer.
| The default header will print the cover information including the device hostname in the report header when selecting not to print the report cover in Advanced Settings. |
4. If you are finished editing the template, select Save in the template toolbar to save your changes.
5. Select Return in the toolbar to return to Create Report page.
To add a chart to a report template:
1. Go to the Reports tab and select the report from the tree menu to which you would like to add a chart.
2. Select Go To Template in the right-click menu to display the report template.
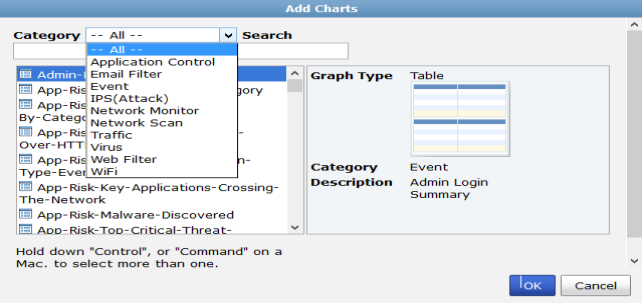
3. Click and drag the chart icon to the location where you want to add the chart.
When you release the mouse button, the Add Charts dialog box will open.
4. Find the chart that you would like to add in one of the following ways:
• Browse the list of all the available the available charts.
• Select the category of the chart you are looking for and then browse the list of the charts in that category.
• Search for the chart by entering all or part of the chart name into the Search field.
5. Select OK once you have selected the chart you would like to add.
The chart’s placeholder will appear in the location that you had selected in the template.
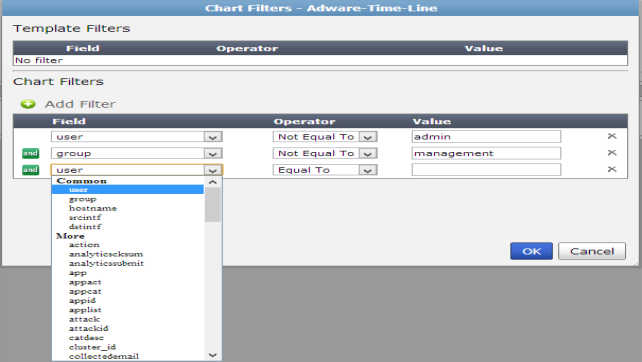
6. To add a chart filter, select the filter icon.
The Chart Filters dialog box will open.
7. If you are finished editing the template, select Save in the template toolbar to save your changes.
8. Select Return in the toolbar to return to Create Report page.
To edit a predefined chart in a report template:
1. Go to the Reports tab and select the report from the tree menu to which you would like to add a chart.
2. Select Go To Template in the right-click menu to display the report template.
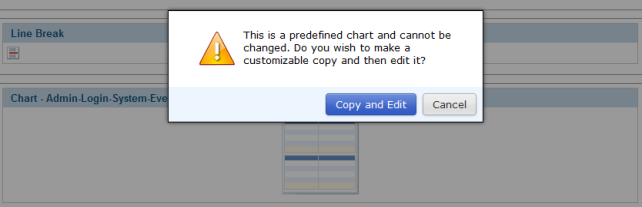
3. In the chart you want to edit, select the Edit icon in the chart toolbar.
A warning dialog box is displayed.
4. Select the Copy and Edit button.
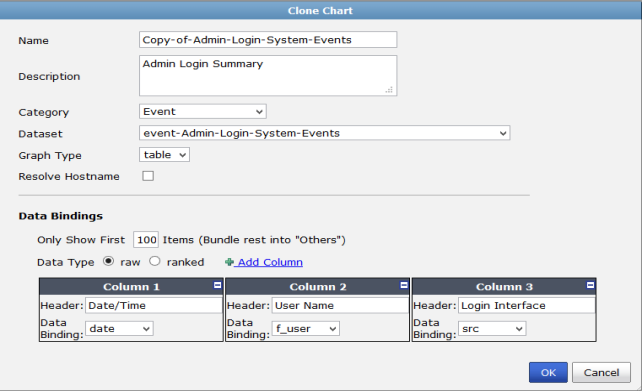
The Clone Chart page is displayed.
5. Edit the chart as required and select OK to save the changes. The copy will replace the predefined chart in the report template. The default name for a cloned chart is Copy-of-Original-Chart-Name.
6. If you are finished editing the template, select Save in the template toolbar to save your changes.
7. Select Return in the toolbar to return to Create Report page.
To add an image to a report template:
1. Go to the Reports tab and select the report from the tree menu to which you would like to add an image.
2. Select Go To Template in the right-click menu to display the report template.
3. Click and drag the image icon to the location where you want to add the image.
The Choose a graphic dialog box will open.
4. Select an image from the list, or select Upload to browse for an image on your computer.
5. Select OK once you have selected the image you would like to add.
The image will appear in the location that you had selected in the template.
6. If you are finished editing the template, select Save in the template toolbar to save your changes.
7. Select Return in the toolbar to return to Create Report page.
To add headings to a report template:
1. Go to the Reports tab and select the report from the tree menu to which you would like to add headings.
2. Select Go To Template in the right-click menu to display the report template.
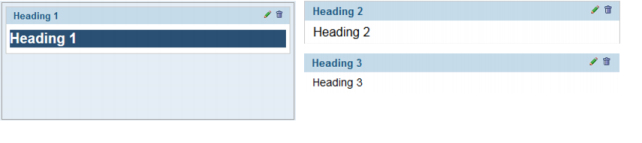
3. Click and drag the required heading icon to the location where you want to add the template heading.
When you release the mouse button, the selected element will be placed into the template.
4. To edit the heading text and level, select the edit icon on the template element, or double-click on the element.
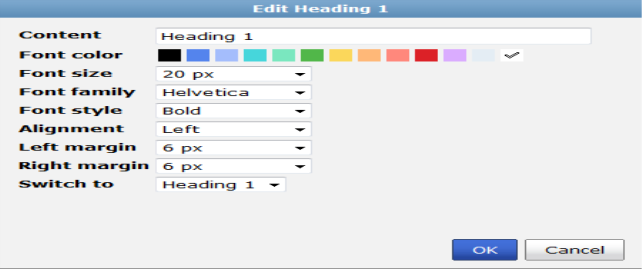
The Edit Heading dialog box will open.
5. Configure the following settings:
Content | Enter the heading text. |
Font color | Select the font color from the palette. |
Font size | Enter the font size. |
Font family | Select one of the following: Courier, Helvetica, Times, SimSun, SimHei, MingLiu, MS-Gothic, MS-PGothic, MS-Mincyo, MS-PMincyo, DotumChe, Dotum, BatangChe, or Batang. |
Font style | Select one of the following: Regular, Bold, Italic, or Bold and Italic. |
Alignment | Select one of the following: Left, Center, or Right. |
Left margin | Select the left margin value from the drop-down list. |
Right margin | Select the right margin value from the drop-down list. |
Switch to | Select to change the heading type. |
6. Select OK to finish editing the heading.
7. If you are finished editing the template, select the Save icon to save your changes.
8. Select Return in the toolbar to return to Create Report page.
To add text to a report template:
1. Go to the Reports tab and select the report from the tree menu to which you would like to add text.
2. Select Go To Template in the right-click menu to display the report template.
3. Click and drag the text icon to the location where you want to add the text box.
When you release the mouse button, the selected element will be placed into the template.
4. To edit the text, select the edit icon on the template element, or double-click on the element.
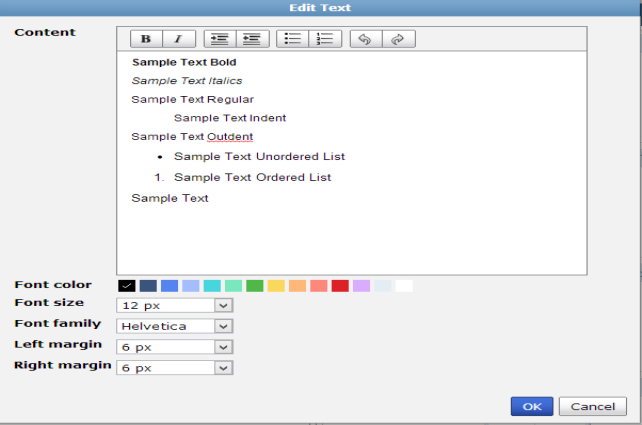
The Edit Text dialog box will open.
5. Configure the following settings:
Content | Enter the text in this text field. You can change text elements in the text toolbar. The following options are available: bold, italics, indent, outdent, unordered list (bullets), ordered list (numbered list), undo, and redo. Use the right-click menu to cut, copy, paste, and delete content. You can also configure languages and the spell checker. |
Font color | Select the font color from the palette. |
Font size | Enter the font size. The default size is 12 px. |
Font family | Select one of the following: Courier, Helvetica, Times, SimSun, SimHei, MingLiu, MS-Gothic, MS-PGothic, MS-Mincyo, MS-PMincyo, DotumChe, Dotum, BatangChe, or Batang. |
Font style | Select one of the following: Regular, Bold, Italic, or Bold and Italic. |
Left margin | Select the left margin value from the drop-down list. |
Right margin | Select the right margin value from the drop-down list. |
6. Select OK to finish editing the text.
7. If you are finished editing the template, select Save in the template toolbar to save your changes.
8. Select Return in the toolbar to return to Create Report page.
| When adding text to the report header or footer, you can only edit the content. Additional settings are not available for the text element in the report header or footer. |
To add breaks to a report template:
1. Go to the Reports tab and select the report from the tree menu that you would like to edit.
2. Select Go To Template in the right-click menu to display the report template.
3. Click and drag the required break icon to the location where you want to add the break. Line breaks and page breaks are available.
When you release the mouse button, the selected break will be placed into the template.
4. If you are finished editing the template, select Save in the template toolbar to save your changes.
5. Select Return in the toolbar to return to Create Report page.
To edit cover page settings:
1. Go to the Reports tab and select the report from the tree menu that you would like to edit.
2. Select Edit Cover Page in the Define Report Template section.
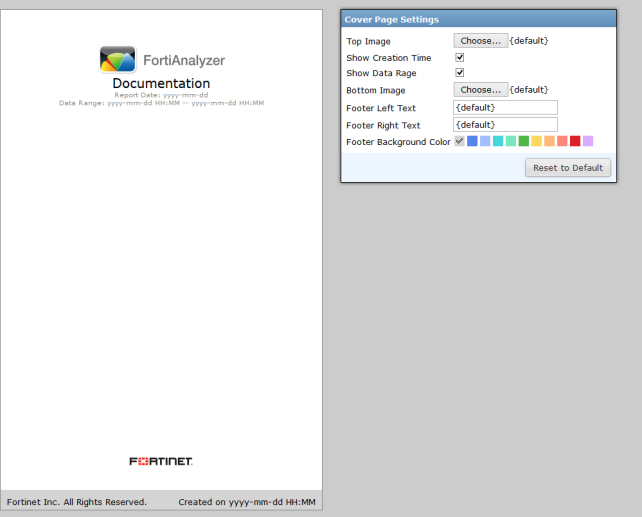
The Cover Page Settings page opens.
3. Configure the following settings:
Top Image | Select Choose to select an image or upload a new image. Select an image in the pop-up window and select OK to save the selection. |
Show Creation Time | Select the checkbox to print the report date on the cover page. |
Show Data Range | Select the checkbox to print the data range on the cover page. |
Bottom Image | Select Choose to select an image or upload a new image. Select an image in the pop-up window and select OK to save the selection. |
Footer Left Text | Select to edit the text printed in the left hand footer of the cover page. |
Footer Right Text | Select to edit the text printed in the left hand footer of the cover page. |
Footer Background Color | Select the cover page footer background color from the palette. |
Reset to Default | Select to reset the cover page settings to their default settings. |
4. Select the Save button in the toolbar to save changes and select the Template button to return to the report template page.
5. Select Return in the toolbar to return to Create Report page.
To edit the workspace of a report template:
1. Go to the Reports tab and select the report from the tree menu that you would like to edit.
2. Select Go To Template in the right-click menu to display the report template.
3. Select Setting in the template toolbar.
The Edit Workspace window opens.
4. Configure the following settings:
Background Color | Select the background color from the palette. |
Font color | Select the font color from the palette. |
Font size | Enter the font size. The default size is 12 px. |
Font family | Select one of the following: Courier, Helvetica, Times, SimSun, SimHei, MingLiu, MS-Gothic, MS-PGothic, MS-Mincyo, MS-PMincyo, DotumChe, Dotum, BatangChe, or Batang. |
Font style | Select one of the following: Regular, Bold, Italic, or Bold and Italic. |
Alignment | Select one of the following: Left, Center, or Right. |
Left margin | Select the left margin value from the drop-down list. |
Right margin | Select the right margin value from the drop-down list. |
5. If you are finished editing the template, select Save in the template toolbar to save your changes.
6. Select Return in the toolbar to return to Create Report page.