Configure reports
Reports and report templates can be created, edited, cloned, and deleted. You can also import and export report templates. New content can be added to and organized on a template, including: new sections, three levels of headings, text boxes, images, charts, and line and page breaks.
To create a new report template:
1. Go to the Reports tab and right-click on Reports in the tree menu.
2. In the right-click menu, under the Report heading, select Create New.
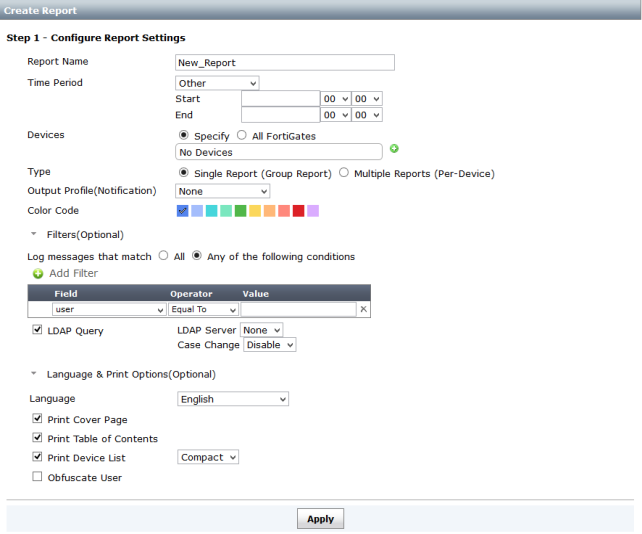
The Create Report page opens.
4. Select Apply to save the settings. Step 2 - Define Report Template and Step 3 - Schedule Report menu options are now available.
5. In the Define Report Template section, select Edit Template.
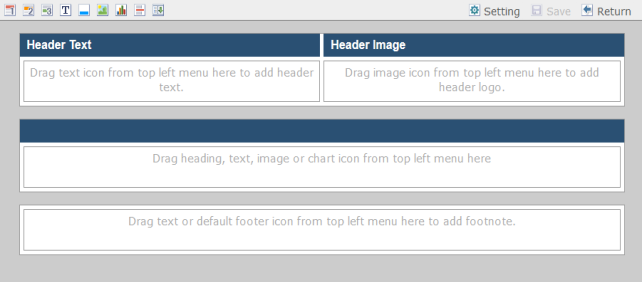
The template page opens
6. In the
Template page you can edit the report layout, add headers, text fields, images, and charts. Alternatively, you can right-click the report name and select
Go To Template from the menu. For more information on template elements, see
“Add report template content”.
8. Select Save in the template toolbar to save changes made to the report template. Select Return in the template toolbar to return to the Create Report page.
10. Select Save in the template toolbar to save the new report cover page. Select Return in the template toolbar to return to the Create Report page.
12. Select Apply to save the report template.
To clone a report template:
1. Go to the Reports tab and right-click on the report you would like to clone in the tree menu.
2. In the right-click menu, under the Report heading, select Clone.
3. In the Clone Report Template dialog box, enter a name for the new template, and select OK.
A new template with the same information as the original template is created with the given name. You can then modify the cloned report as required.
To export a report template:
1. Go to the Reports tab and right-click on the report you would like to export in the tree menu.
2. In the right-click menu, under the Report heading, and select Export.
3. In the pop-up dialog box, select to save the file (.dat) to your management computer, and select OK. You can then import the report template to another FortiManager device.
To import a report template:
1. Go to the Reports tab and right-click on Reports.
2. In the right-click menu, under the Report heading, and select Import.
3. In the Import Report Template dialog box, select Browse and locate the report template (.dat) file on your management computer, and select OK. The report template will be loaded into FortiManager.
To create a new report template folder:
1. Go to the Reports tab and right-click on Reports in the tree menu.
2. In the right-click menu, under the Folder heading, and select Create New.
3. In the Create New Folder dialog box, enter a name for the folder, and select OK.
A new template folder is created with the given name.
To delete a report template or report template folder:
1. Go to the Reports tab and right-click on the report template or report template folder that you would like to delete in the tree menu.
2. In the right-click menu select Delete.
3. In the confirmation dialog box, select OK to delete the report template or folder.