Step 2: Configure the management interface
You use the management port for administrator access. It is also used for management traffic (such as SNMP or syslog). If your appliance has a dedicated management port, that is the port you configure as the management interface; otherwise, it is the convention to use port1 for the management interface.
You configure the following basic settings to get started so that you can access the web UI from a remote location (like your desk):
• Static route—Specify the gateway router for the management subnet so you can access the web UI from a host on your subnet.
• IP address—You typically assign a static IP address for the management interface. The IP address is the host portion of the web UI URL. For example, the default IP address for the management interface is 192.168.1.99 and the default URL for the web UI is https://192.168.1.99.
• Access—Services for administrative access. We recommend HTTPS, SSH, SNMP, PING.
Before you begin:
• You must know the IP address for the default gateway of the management subnet and the IP address that you plan to assign the management interface.
• You need access to the machine room in which a physical appliance has been installed. With physical appliances, you must connect a cable to the management port to get started.
• You need a laptop with an RJ-45 Ethernet network port, a crossover Ethernet cable, and a web browser (Microsoft Internet Explorer 8.0 or newer, or Mozilla Firefox 20 or newer).
• Configure the laptop Ethernet port with the static IP address 192.168.1.2 and a netmask of 255.255.255.0. These settings enable you to access the FortiADC web UI as if from the same subnet as the FortiADC in its factory configuration state.
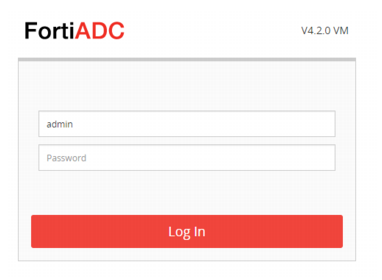
To connect to the web UI:
1. Use the crossover cable to connect the laptop Ethernet port to the FortiADC management port.
2. On your laptop, open the following URL in your web browser:
https://192.168.1.99/
The system presents a self-signed security certificate, which it presents to clients whenever they initiate an HTTPS connection to it.
3. Verify and accept the certificate, and acknowledge any warnings about self-signed certificates.
The system displays the administrator login page. See
Figure 3.
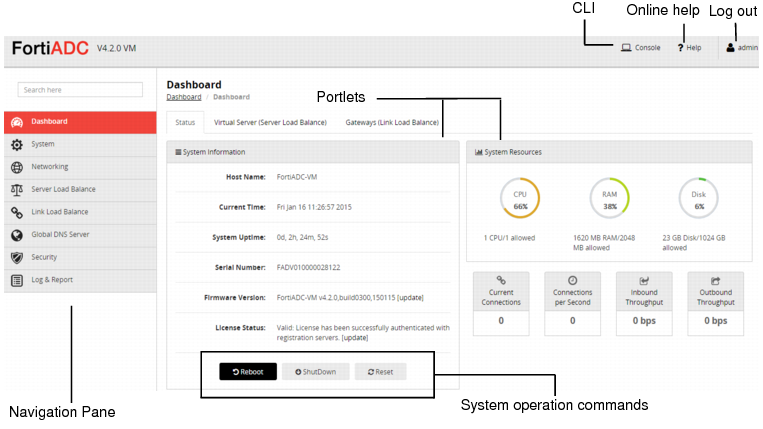
4. Enter the username admin and no password.
The system displays the dashboard. See
Figure 4.
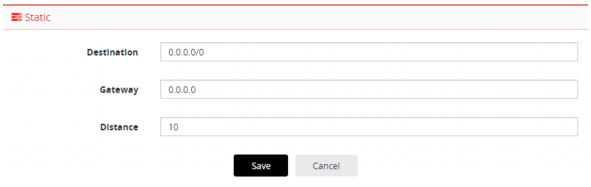
To configure a static route:
1. Go to Networking > Routing.
The configuration page displays the Static tab.
2. Click
Add to display the configuration editor. See
Figure 5.
3. Configure a static route that specifies the IP address of the default gateway router for the management subnet.
4. Save your changes.
For detailed information, refer to the online help or see
“Configuring static routes”.
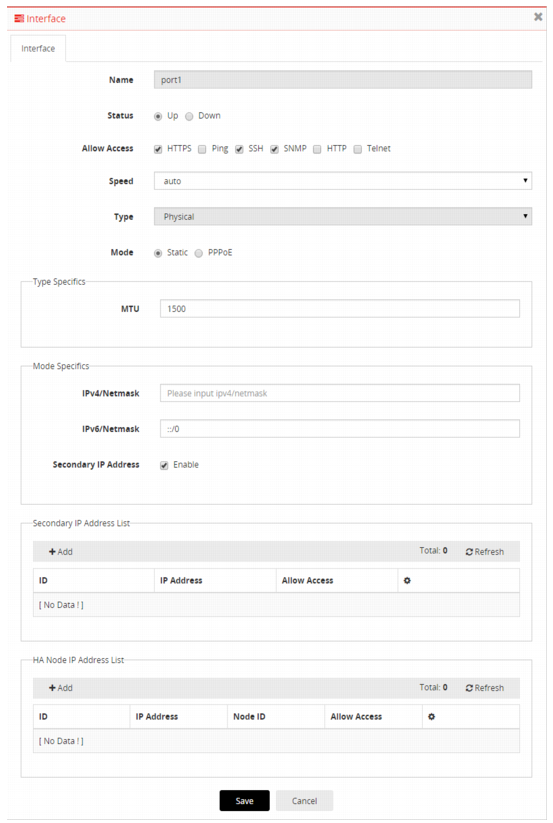
To configure the network interface IP address and services:
1. Go to Networking > Interface to display the configuration page.
2. Double-click the row for port1 to display the configuration editor. See
Figure 6.
3. Use CIDR notation to specify the IP address/netmask, and enable services related to administrative access.
4. Save the configuration.
The system processes the update and disconnects your HTTP session because the interface has a new IP address and therefore the web UI has a new URL.
At this point, you should be able to connect to the web UI from a host on the management subnet you just configured. You can go back to your desk to verify connectivity by attempting to open the web UI at the new address.
For detailed information on configuring network interfaces, refer to the online help or see
“Configuring network interfaces”.