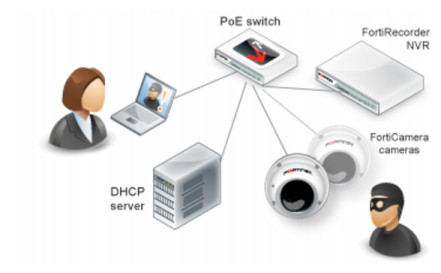
Scenario 2: Connection with a third party DHCP server
In this scenario, you already have a DHCP server running in your existing network and you are installing the FortiRecorder NVR and FortiCam cameras in your network.
Note that the NVR will be using a static IP address and the cameras will be getting DHCP IP addresses from the third party DHCP server

.
1. Change your PC’s IP address to be on the same subnet as the FortiRecorder port1’s default IP address 192.168.1.99. For example, set your PC’s IP to 192.168.1.98.
2. Connect your PC directly to FortiRecorder’s port1 interface.
3. On your PC, open a web browser and connect to https://192.168.1.99. Log in to the admin administrator account with Name: admin and Password: (none).
4. On the FortiRecorder web UI, go to System > Network > Interface and double click on port1 interface. Change the IP address to one that is accessible to the DHCP server and your network. And make sure Discover cameras on this port is enabled.
5. Change your PC’s IP address back.
6. Connect your PC and the FortiRecorder NVR to your network. Then connect the camera to your network through a PoE switch.
7. Go to Camera > Configuration > Camera, and click Discover. After several seconds, a list of discovered cameras should appear. Newly discovered cameras will be highlighted in yellow, and their Status column will contain Not Configured.
9. Go to Monitor > Video Monitor to view the live feed from the camera.
 .
. .
. .
.