FortiGate VM virtual hard disk
You must configure the FortiGate VM virtual hard disk in the server settings page.
If you know your environment will expand in the future, it is recommended to increase the hard disk size beyond 30GB. The VM license limit is 2TB.
Configure a FortiGate VM virtual hard drive:
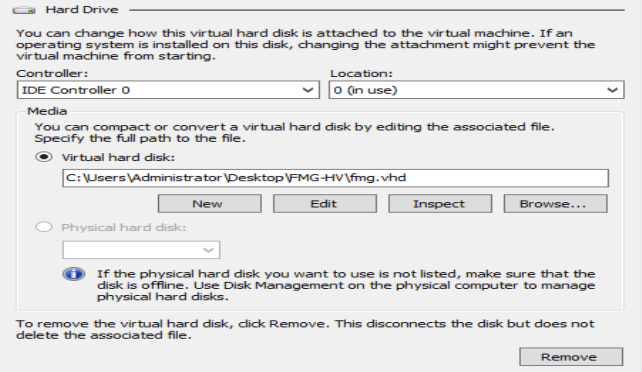
1. In the Settings page, select IDE Controller 0 > Hard Drive from the Hardware menu.
The
Hard Drive page is displayed.
2. Select New to create a new virtual hard disk.
The
New Virtual Hard Disk Wizard opens.
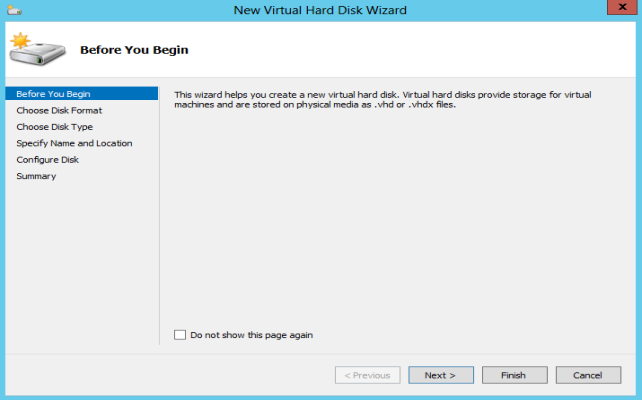
3. This wizard helps you to create a new virtual hard disk.
Select
Next to continue. The
Choose Disk Format page opens.
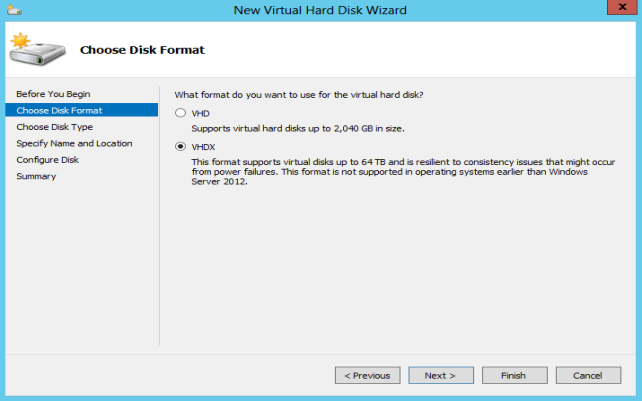
4. Select to use VHDX format virtual hard disks. This format supports virtual disks up to 64TB and is resilient to consistency issues that might occur from power failures. This format is not supported in operating systems earlier than Windows Server 2012. Note that FortiGate-VM does not support hard disks larger than 2TB.
Select
Next to continue. The
Choose Disk Type page opens.
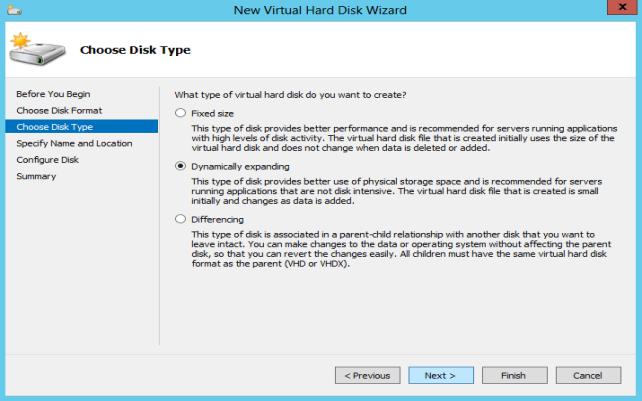
5. Select the type of virtual disk you want to use. Select one of the following disk types:
• Fixed size: This type of disk provides better performance and is recommended for servers running applications with high levels of disk activity. The virtual hard disk file that is created initially uses the size of the virtual hard disk and does not change when data is deleted or added.
• Dynamic expanding: This type of disk provides better use of physical storage space and is recommended for servers running applications that are not disk intensive. The virtual disk file that is created is small initially and changes as data is added.
• Differencing: This type of disk is associated in a parent-child relationship with another disk that you want to leave intact. You can make changes to the data or operating system without affecting the parent disk, so that you can revert the changes easily. All children must have the same virtual hard disk format as the parent (VHD or VHDX).
Select
Next to continue. The
Specify Name and Location page opens.
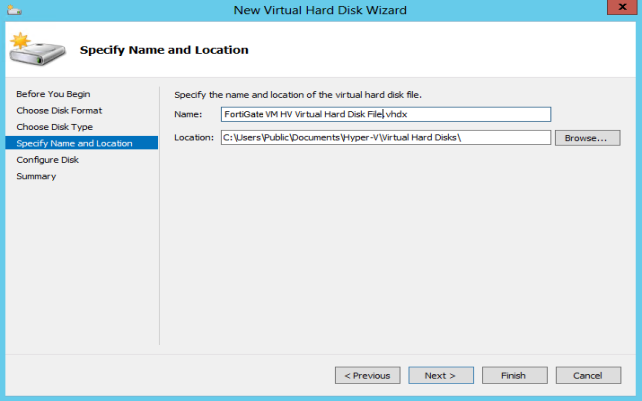
6. Specify the name and location of the virtual hard disk file. Use the Browse button to select a specific file folder on your server.
Select
Next to continue. The
Configure Disk page opens.
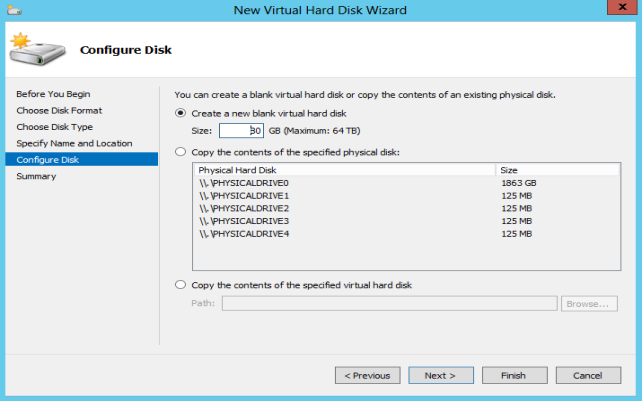
7. Select to Create a new blank virtual hard disk and enter the size of the disk in GB. The maximum size is dependent on your server environment.
Select
Next to continue. The
Summary page opens.
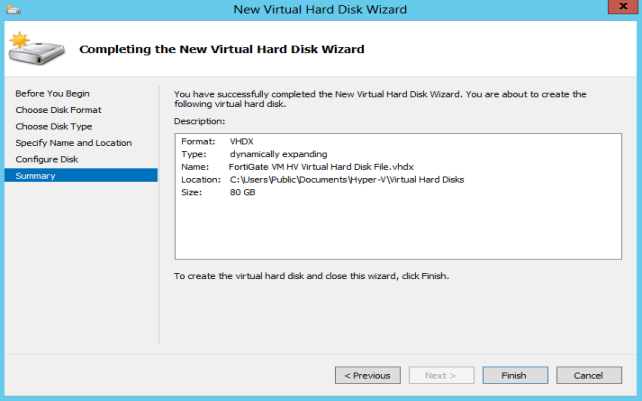
8. The summary page provides details of the virtual hard disk. Select Finish to create the virtual hard disk.
9. Select Apply to save the settings and select OK to exit the settings page.