Figure 85: Wireless profiles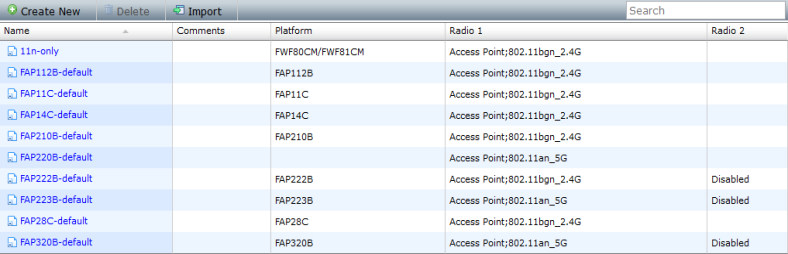
Create New | Create a new wireless profile. See “To create a new wireless profile:”. |
Delete | Select to delete the selected wireless profiles. See “To delete a wireless profile:”. |
Import | Select to import wireless profiles. See “To import a wireless profile:”. |
Search | Search the wireless profiles by entering a search term in the search field. |
Name | The profile’s name. |
Comments | Comments about the profile. |
Platform | The platform that the wireless profile applies to. |
Radio 1 | The function of the Radio 1 in the profile. |
Radio 2 | If applicable, the Radio 2 function in the profile. |
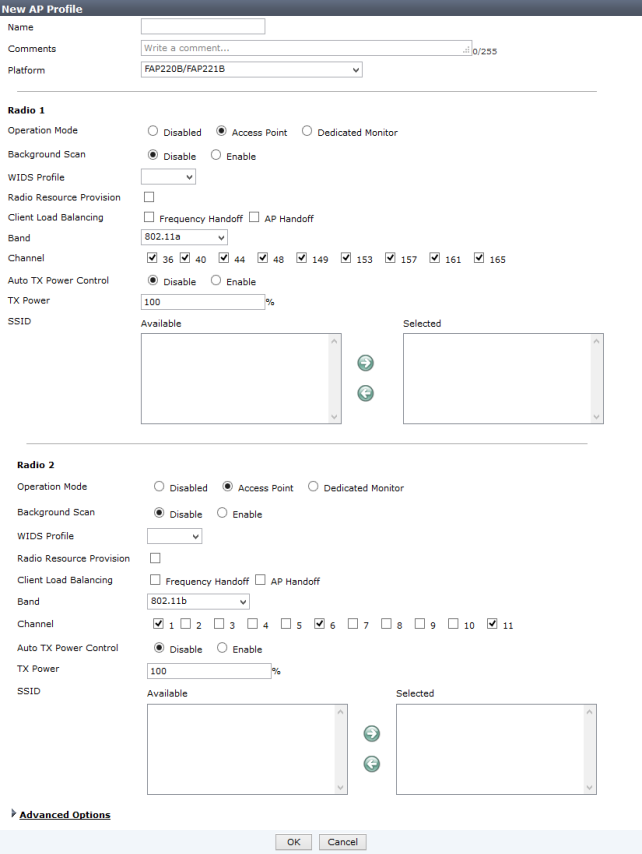
Name | Enter a name for the profile. | |
Comment | Optionally, enter comments. | |
Platform | Select the platform that the profile will apply to from the drop-down list. | |
Radio 1 & 2 | Configure the radio settings. The Radio 2 settings will only appear if applicable to the platform that is selected. | |
Operation Mode | Select one of Disabled, Access Point (default), or Dedicated Monitor. If Disabled is selected, no further options are available. If Dedicated Monitor is selected, only the WIDS profile and Rogue AP On-Wire Scan options are available. | |
Background Scan | Enable or disable background scanning. | |
WIDS Profile | Select a WIDS profile from the drop-down list. | |
Rogue AP On-Wire Scan | Select to enable rogue AP on-wire scan. This option is only available is the operation mode is set to Dedicated Monitor, or if background scan is enabled. | |
Radio Resource Provision | Select to enable radio resource provisioning. | |
Client Load Balance | Select the client load balancing methods to use. Frequency and/or AP handoff can be used. | |
Band | Selected the wireless band from the drop-down list. | |
Channel | Select the channel or channels that are available. | |
Auto TX Power Control | Enable or disable automatic TX power control. | |
TX Power | If Auto TX Power Control is disabled, enter the TX power in the form of the percentage of the total available power. | |
TX Power Low | If Auto TX Power Control is enabled, enter the minimum TX power in dBm. | |
TX Power High | If Auto TX Power Control is enabled, enter the maximum TX power in dBm. | |
SSID | Select available SSIDs from the Available box, and move them to the Selected box using the arrow buttons to select the SSIDs to apply to this profile. | |
Advanced Options | Configure advanced options for the SSID. | |
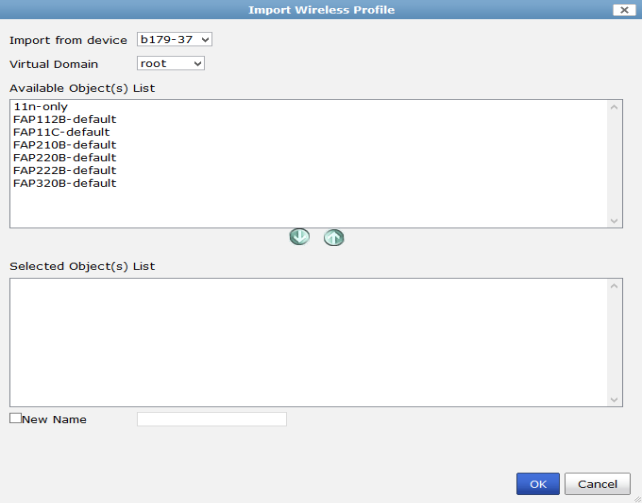
Import from device | Select a device from which to import the profile or profiles from the drop-down list. This list will include all the devices available in the ADOM. | |
Virtual Domain | Is applicable, select the virtual domain from which the profile will be imported. | |
Available Objects List | The available objects that can be imported. Select an object or objects and then select the down arrow to move the selected object or objects to the Selected Objects List. | |
Selected Objects List | The objects that are to be imported. To remove an object or objects from the list, select the object or objects and then select the up arrow. The selected items will be moved back to the Available Objects List. | |
New Name | Select to create a new name for the item or items that are being imported, and then enter the name in the field. | |