Figure 185: Event handler page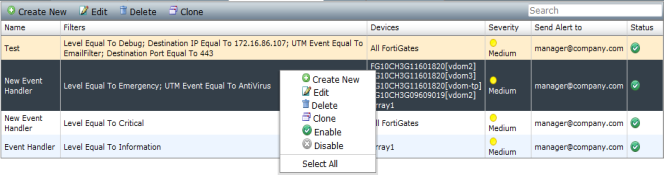
Name | The name of the event handler. |
Filters | The filters that you have configured for the event handler. |
Devices | The devices that you have configured for the event handler. This field will either display All FortiGates or list each device or log array. |
Severity | The severity that you configured for the event handler. This field will display Critical, High, Medium, or Low. |
Send Alert to | The email address, SNMP server, or syslog server that has been configured for the event handler. |
Status | The status of the event handler. This field will display a green circle check mark when enabled or a grey circle x when disabled. |
Create New | Select to create a new event handler. |
Edit | Select an event handler and select edit to make changes to the entry. |
Delete | Select one or all event handlers and select delete to remove the entry(s). |
Clone | Select an event handler in this page and click to clone the entry. A cloned entry will have Copy added to the name field. You can rename the cloned entry while editing the event handler. |
Select All | Select an event handler and select Select All in the right-click pop-up menu. You can then select Delete in the toolbar to select all entries. |
Enable | Select an event handler and select Enable in the right-click pop-up menu. |
Disable | Select an event handler and select Disable in the right-click pop-up menu. |

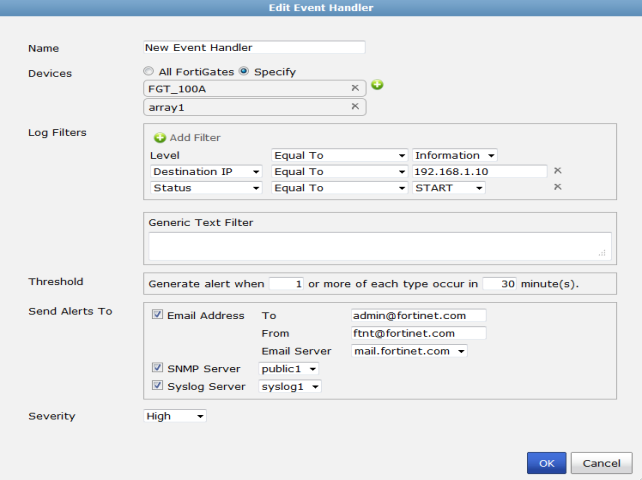
Name | Enter a name for the event handler. | |
Devices | Select All FortiGates or select Specify and use the plus (+) symbol to add devices or log arrays. Note: When creating a new event handler for FortiMail and FortiWeb, the All FortiGates option is a bug. | |
Log Filters | Select the plus (+) symbol to add log filters. | |
Level | Select the filter level in the first drop-down list. Select the severity level in the second drop-down list. Select one of the following: Debug, Information, Notification, Warning, Error, Critical, Alert, or Emergency. | |
Destination IP | Select to filter based on the destination IP, select the filter level, then enter an IP value in the text box. | |
Destination Port | Select to filter based on the destination port, select the filter level, then enter a port value in the text box. | |
Status | Select to filter based on the status, select the filter level, then select one of the following: DENY, ACCEPT, START, DNS, IP-CONN, WEB, CLOSE, TIMEOUT. | |
UTM Event | Select to filter based on a UTM event, select the filter level, then enter a value in the text box. You can create log filters for the following UTM events: AntiVirus, WebFilter, Application Control, Intrusion Protection, EmailFilter, DLP, and VoIP. | |
Threshold | Generate Alert When ‘x’ or more of each type occur in ‘x’ minute(s). | |
Send Alerts To | ||
Email Address | Select the checkbox to enable. Enter a text value in the To and From text boxes and select the email server in the drop-down list. | |
SNMP Server | Select the checkbox to enable. Select an SNMP server in the drop-down list. | |
Syslog Server | Select the checkbox to enable. Select a syslog server in the drop-down list. | |
Severity | Select the severity from the drop-down list. Select one of the following: Low, Medium, High, or Critical. | |
Select Select All in the right-click menu to select all alert event entries. You can then select Delete in the toolbar to delete the selected entries. |