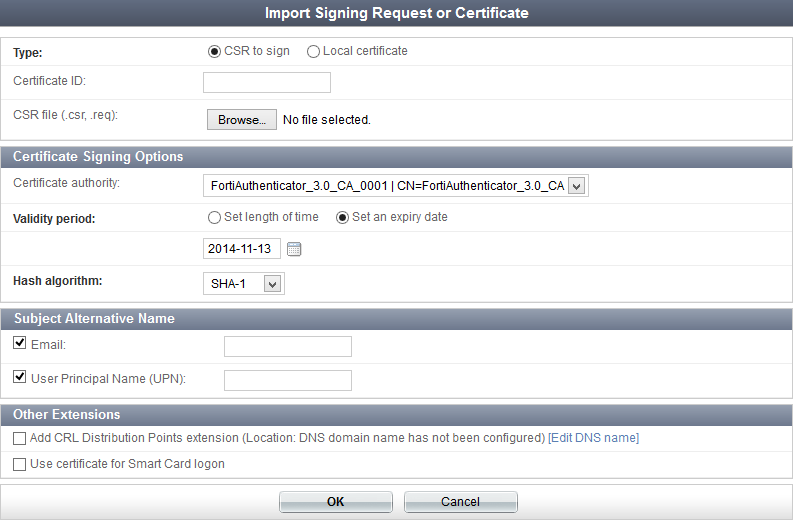
| Certificate ID | Enter a unique ID for the certificate. | |
| Certificate Signing Options | ||
| Issuer | Select the issuer of the certificate, either Local CA or Third-party CA. Selecting Third-party CA generates a CSR that is to be signed by a third-party CA. | |
| Local User (Optional) | If Local CA is selected as the issuer, you may select a local user from the drop-down list to whom the certificate will apply.This option is only available when creating a new user certificate. | |
| Certificate authority | If Local CA is selected as the issuer, select one of the available CAs configured on the FortiAuthenticator unit from the drop-down list. The CA must be valid and current. If it is not you will have to create or import a CA certificate before continuing. See Certificate authorities. |
|
| Subject Information | ||
| Subject input method | Select the subject input method, either Fully distinguished name or Field-by-field. | |
| Subject DN | If the subject input method is Fully distinguished name, enter the full distinguished name of the subject. There should be no spaces between attributes.Valid DN attributes are DC, C, ST, L, O, OU, CN, and emailAddress. They are case-sensitive. | |
| Field-by-field | If the subject input method is Field-by-field, enter the subject name in the Name (CN) field, and optionally enter the following fields:
|
|
| Subject Alternative Name | Subject Alternative Names (SAN) allow you to protect multiple host names with a single SSL certificate. SAN is part of the X.509 certificate standard. For example, SANs are used to protect multiple domain names such as www.example.com and www.example.net, in contrast to wildcard certificates that can only protect all first-level subdomains on one domain, such as *.example.com. This section is not available when Issuer is set to Local CA. |
|
| Enter the email address of a user to map to this certificate. | ||
| User Principal Name (UPN) | Enter the UPN used to find the user’s account in Microsoft Active Directory. This will map the certificate to this specific user. The UPN is unique for the Windows Server domain. This is a form of one-to-one mapping. | |
| Additional Options | ||
| Validity period | Select the amount of time before this certificate expires. This option is only available when Issuer is set to Local CA. Select Set length of time to enter a specific number of days, or select Set an expiry date and enter the specific date on which the certificate expires. |
|
| Key type | The key type is set to RSA. | |
| Key size | Select the key size from the drop-down list: 1024, 2048, or 4096 bits. | |
| Hash algorithm | Select the hash algorithm from the drop-down list, either SHA-1 or SHA-256. | |
| Other Extensions | This option is only available when creating a new user certificate, and when Issuer is set to Local CA. | |
| Add CRL Distribution Points extension | Select to add CRL distribution points extension to the certificate. Note: Once a certificate is issued with this extension, the server must be able to handle the CRL request at the specified location. A DNS domain name must be configured. If it has not been, select Edit DNS name to configure one. See DNS. |
|
| Use certificate for Smart Card logon | ||