You can configure FortiWeb to omit attack signature scans in some cases. You can also configure the signature to generate a log or alert only instead of blocking the attack.
Exceptions can be useful if you know that some URLs, during normal use, cause false positives by matching an attack signature. Signature exceptions define request URLs that are not subject to signature rules.
For example, the HTTP POST URL /pageupload accepts input that is PHP code, but it is the only URL on the host that does. Create an exception that, in the PHP Injection category, disables that specific signature ID for the URL /pageupload in the signature rule that normally blocks all injection attacks.
|
|
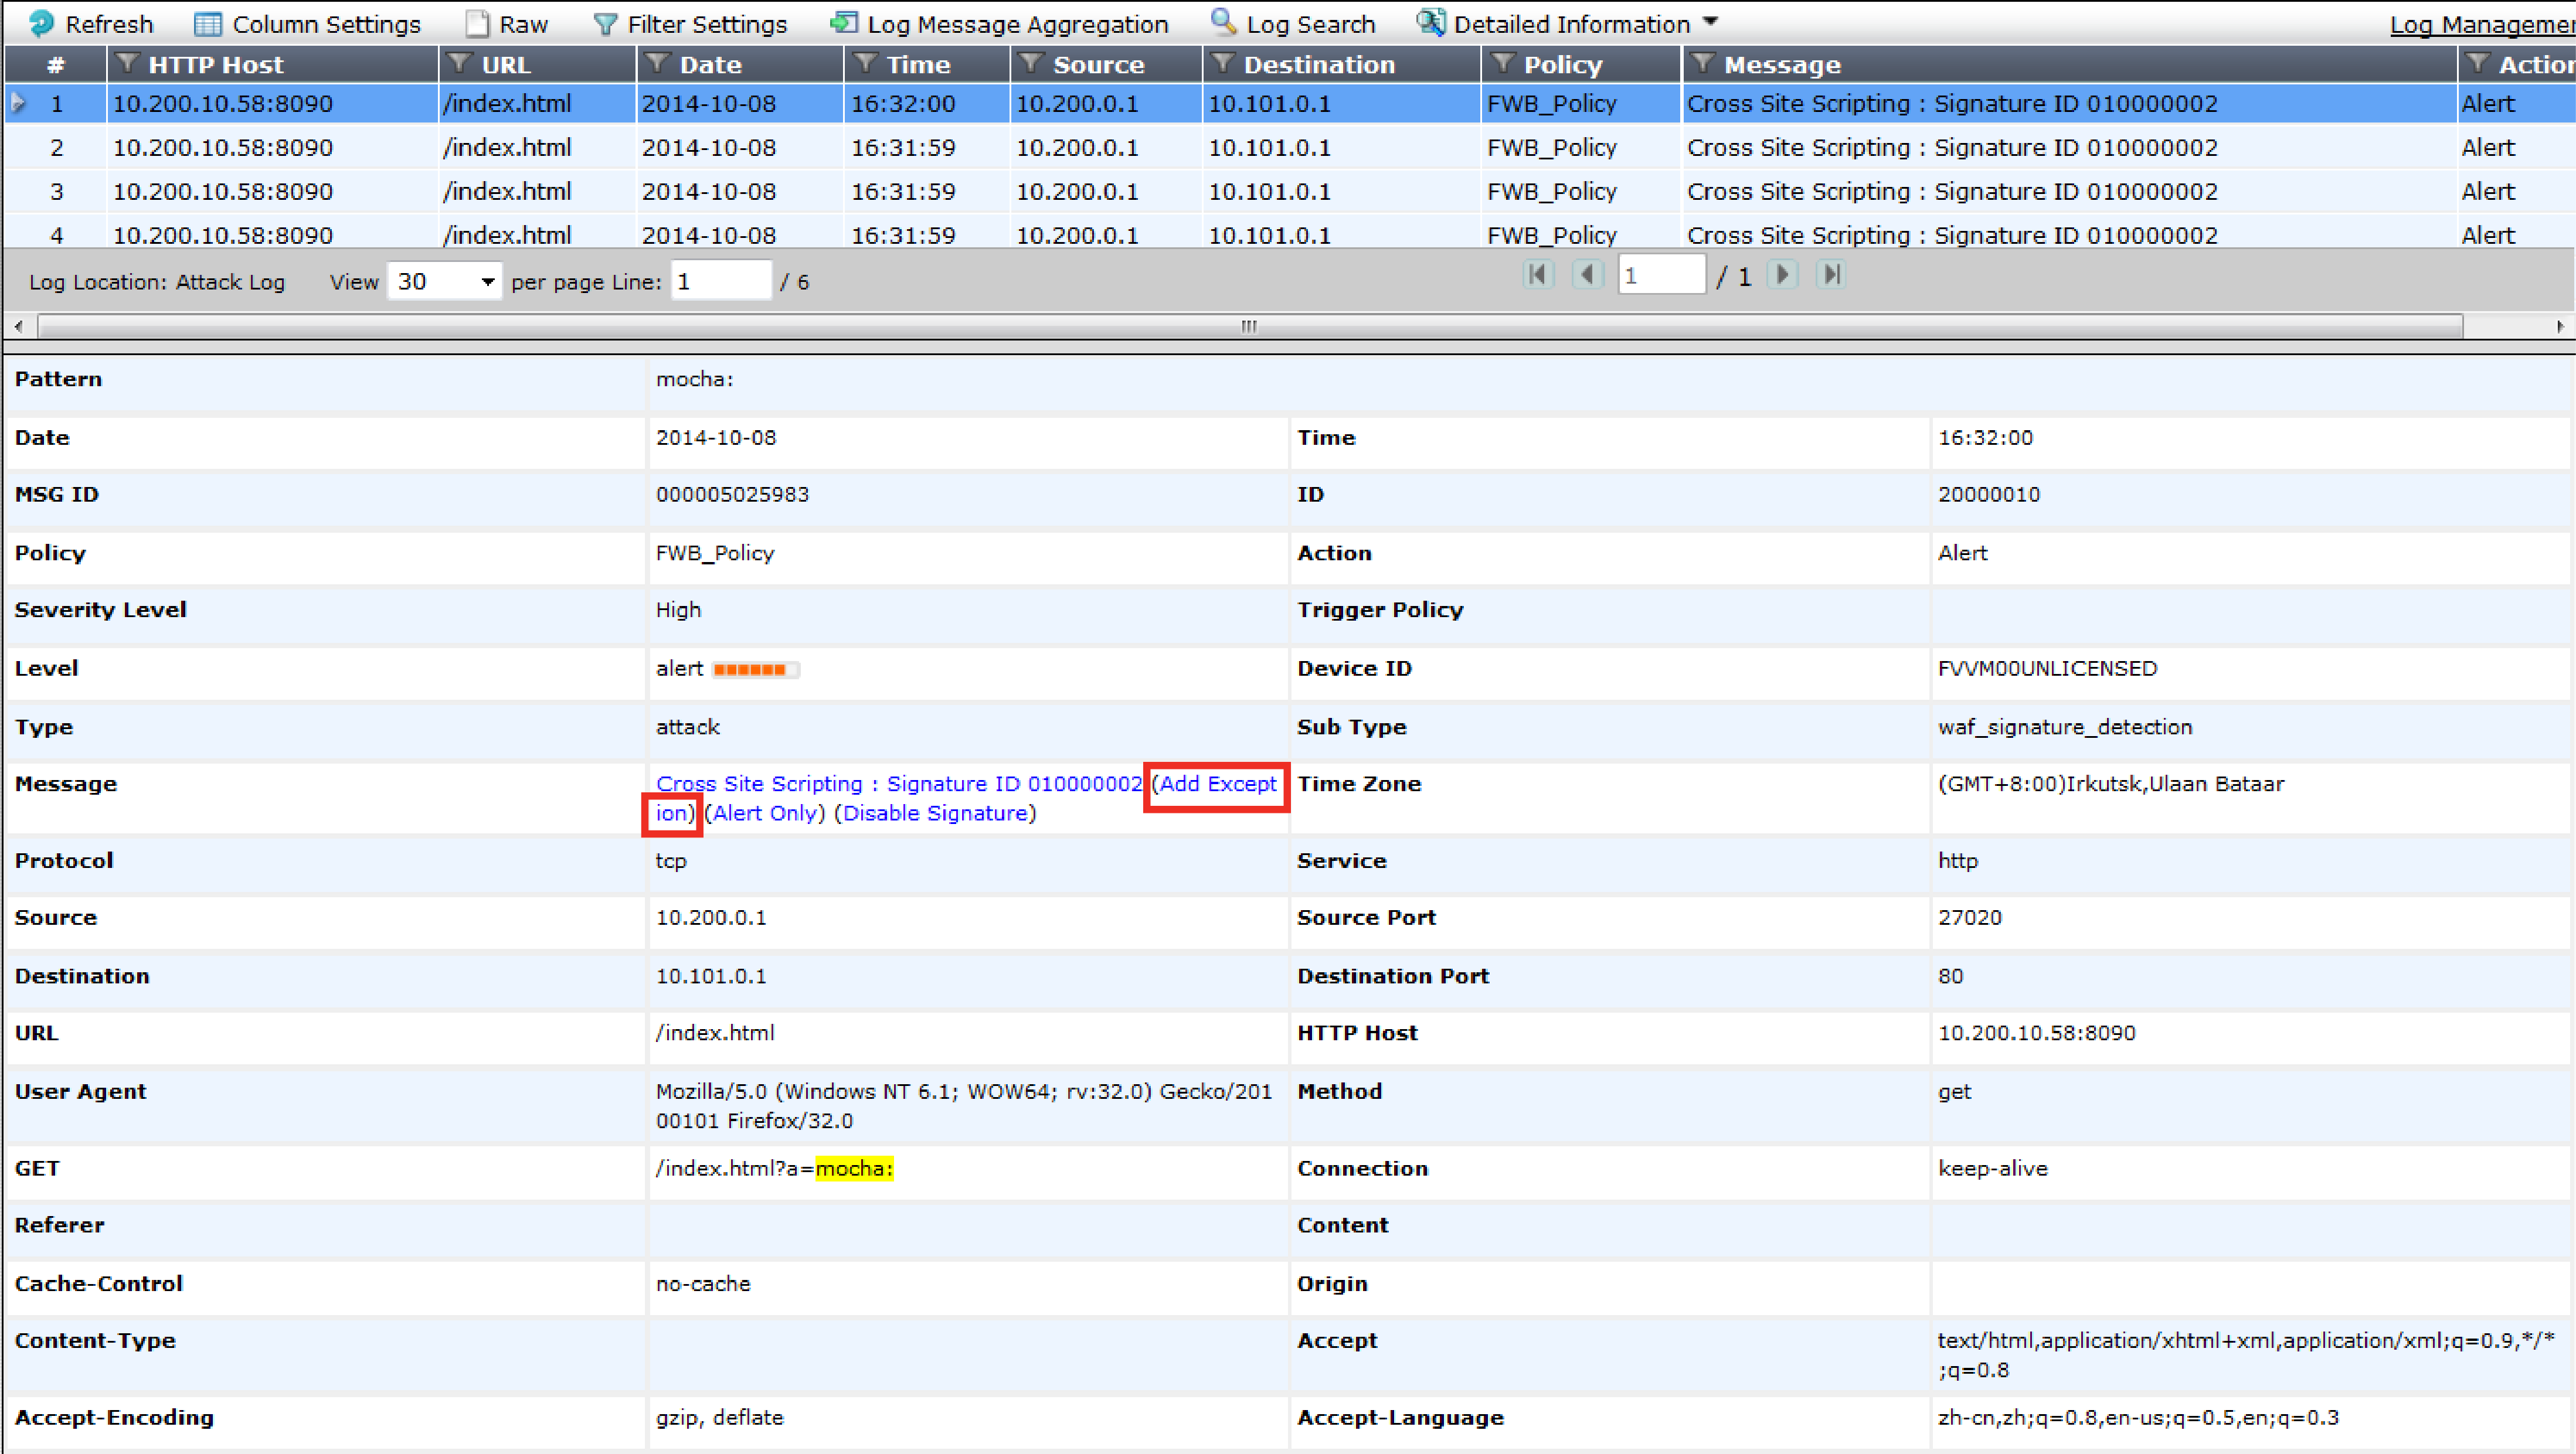
If you are not sure which exceptions to create, examine your attack log for messages generated by normal traffic on servers that are not actually vulnerable to that attack. Click the Add Exception link directly in the attack log message display to create an exception. |
1. Go to Web Protection > Known Attacks > Signatures.
To access this part of the web UI, your administrator’s account access profile must have Read and Write permission to items in the Web Protection Configuration category. For details, see Permissions.
2. Click the row corresponding to an existing signature rule for which you need to individually disable one or more signatures.
A dialog appears.
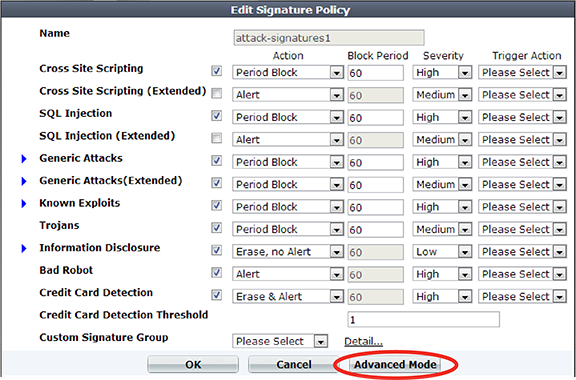
3. Click Advanced Mode.
4. Click Create New.
A dialog appears.
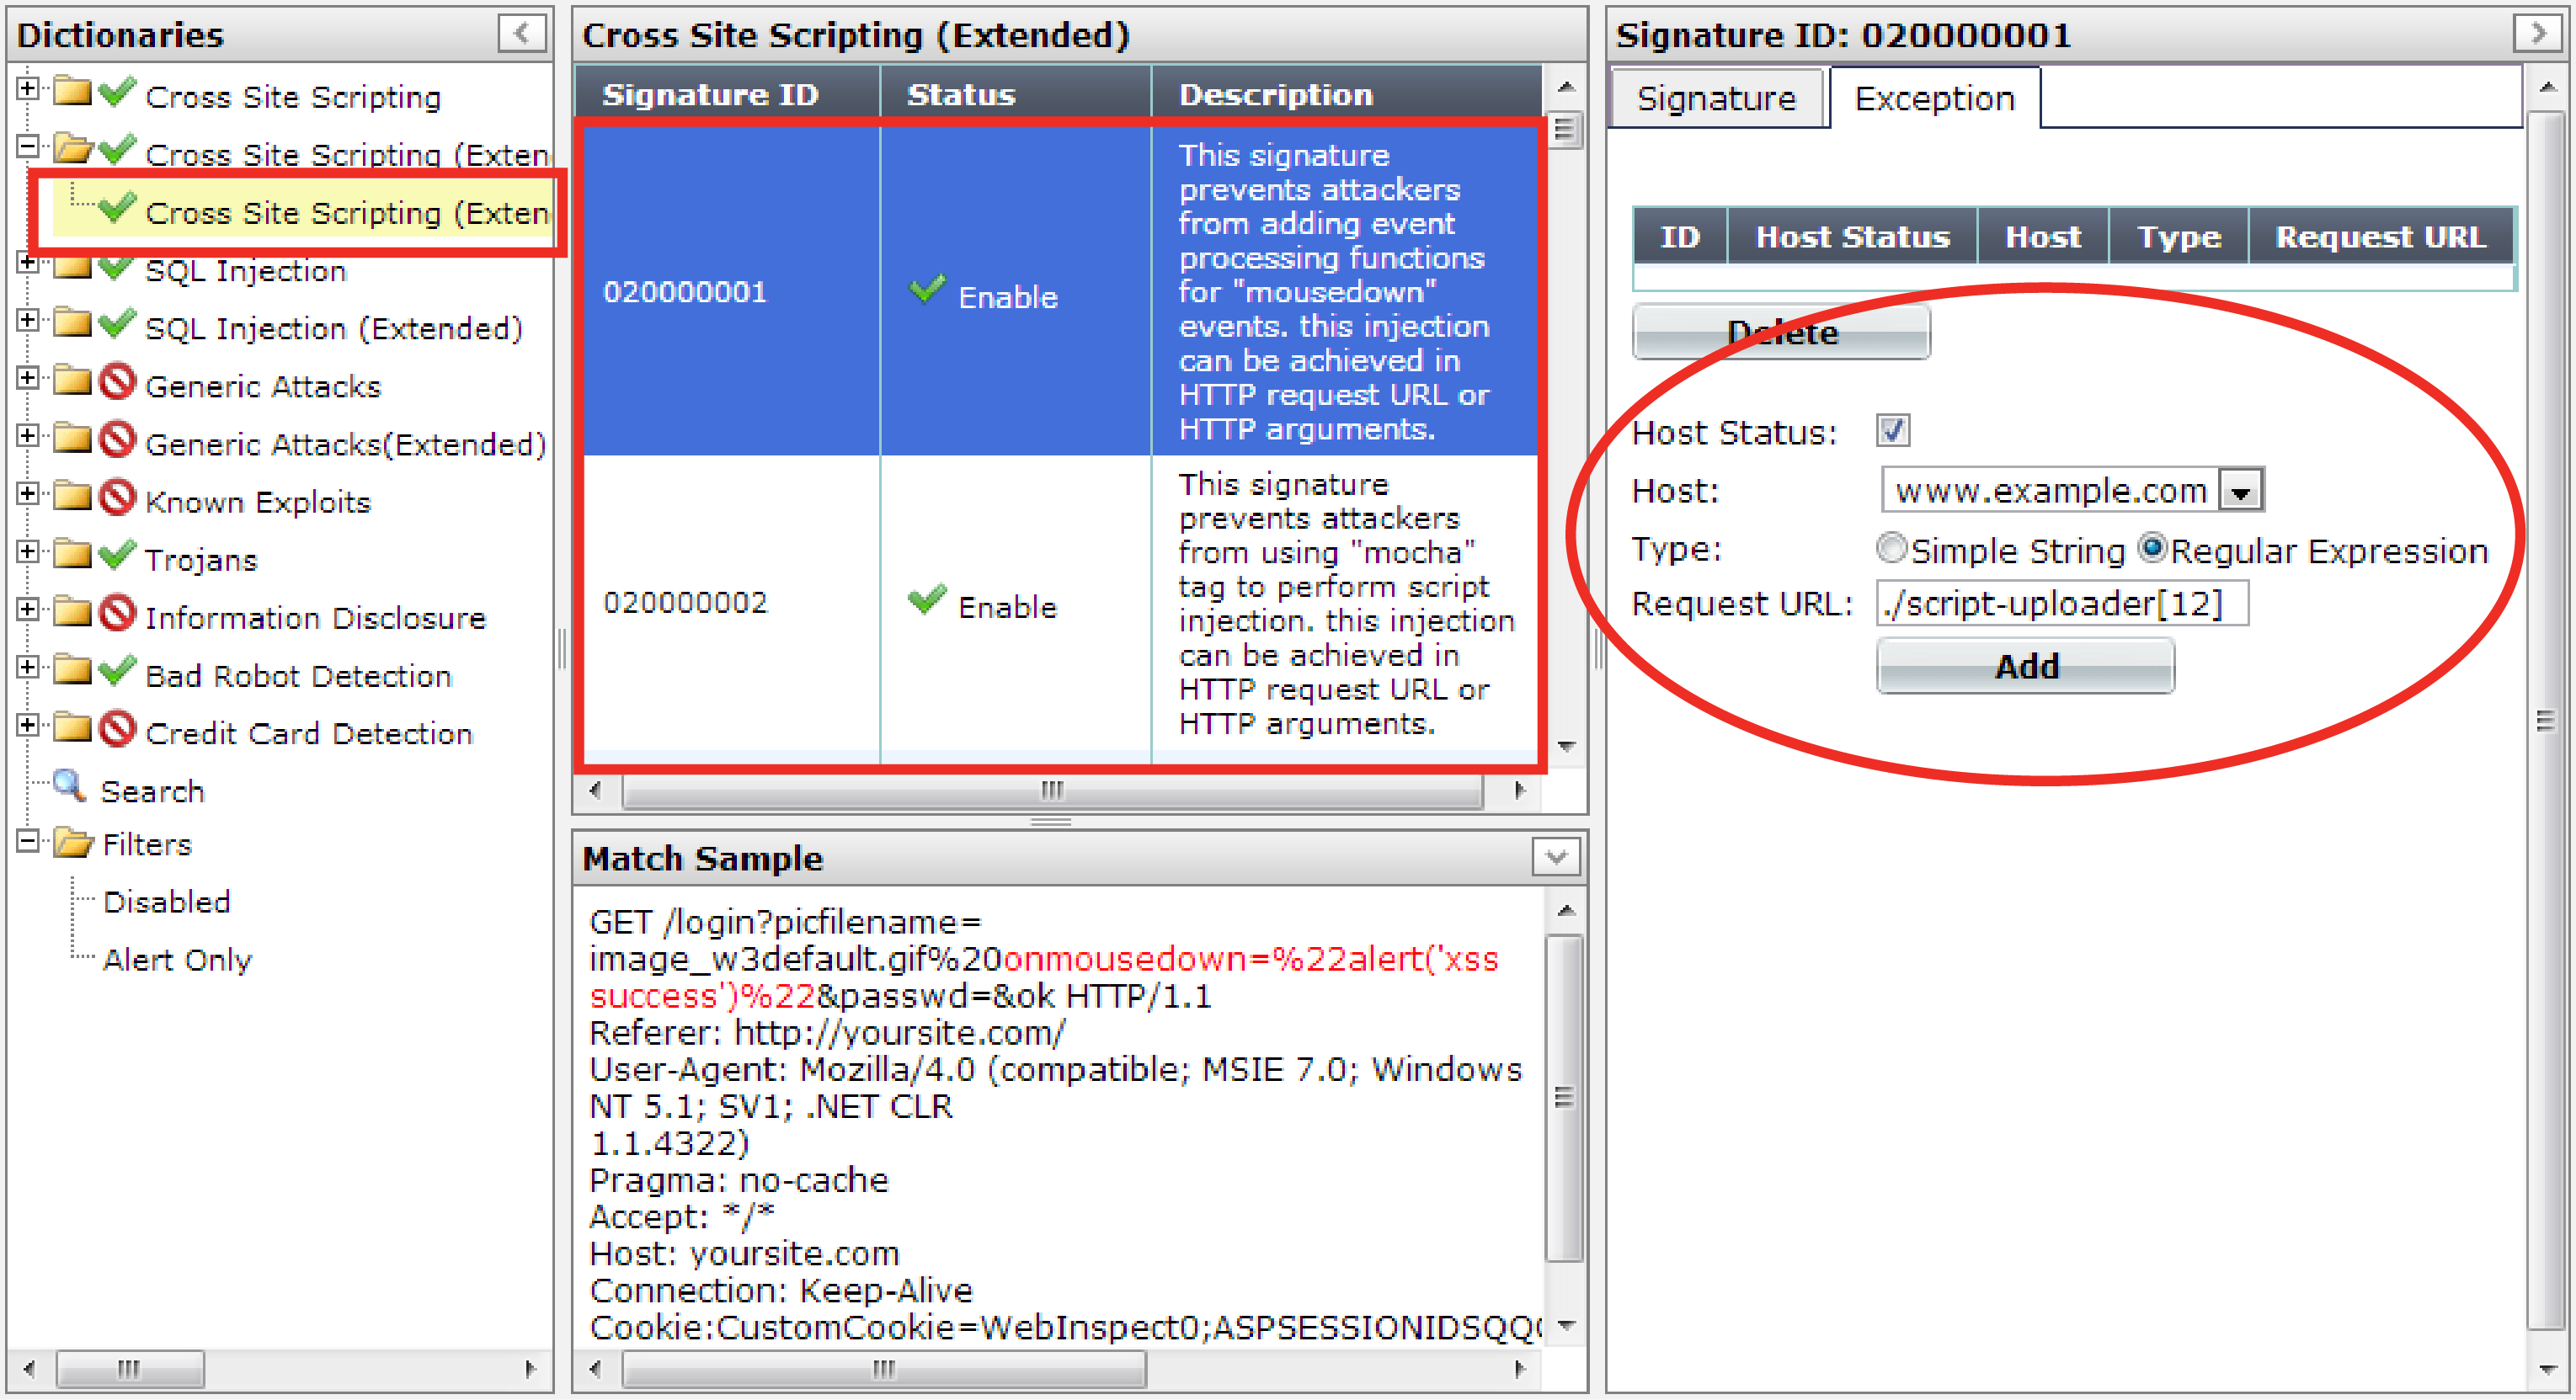
5. In the signature tree on the left, click to open the signature category where you need to disable a specific signature. When you have selected an individual sub-category, a list of individual signature IDs in it will appear in the pane to the right.
6. Click the row of the signature ID that you need to disable.
When selected, the signature row will be highlighted in blue.
7. If you want to disable the signature for this rule, or globally, right-click the signature’s row and select the corresponding option.
8. If you want to receive only logs or alert email about detections, but do not want to block matching requests, in the Signature tab, mark the Alert Only check box.
9. If you want to exempt specific host name/URL combinations, in the pane on the right side, click the Exception tab.
10. Configure these settings:
| Setting name | Description |
|---|---|
| Host |
Select which protected host names entry (either a web host name or IP address) that the This option is available only if Host Status is enabled. |
| Host Status | Enable to require that the Host: field of the HTTP request match a protected host names entry in order to match the signature exception. Also configure Host. |
| Type | Indicate whether Request URL is a Simple String (that is, a literal URL) or a Regular Expression. |
| Request URL |
Depending on your selection in Type, enter either:
Do not include the domain name, such as To create and test a regular expression, click the >> (test) icon. This opens the Regular Expression Validator window where you can fine-tune the expression (see Regular expression syntax). |
11. Click Add.
12. Repeat the previous steps for each entry that you want to add to the signature exception.
After you have disabled or overridden the actions of some individual signatures to be Alert Only, if you need to find them again and change those settings, you can do this quickly by filtering the list of signatures via Filters > Disabled or Filters > Alert Only in the navigation tree on the left.
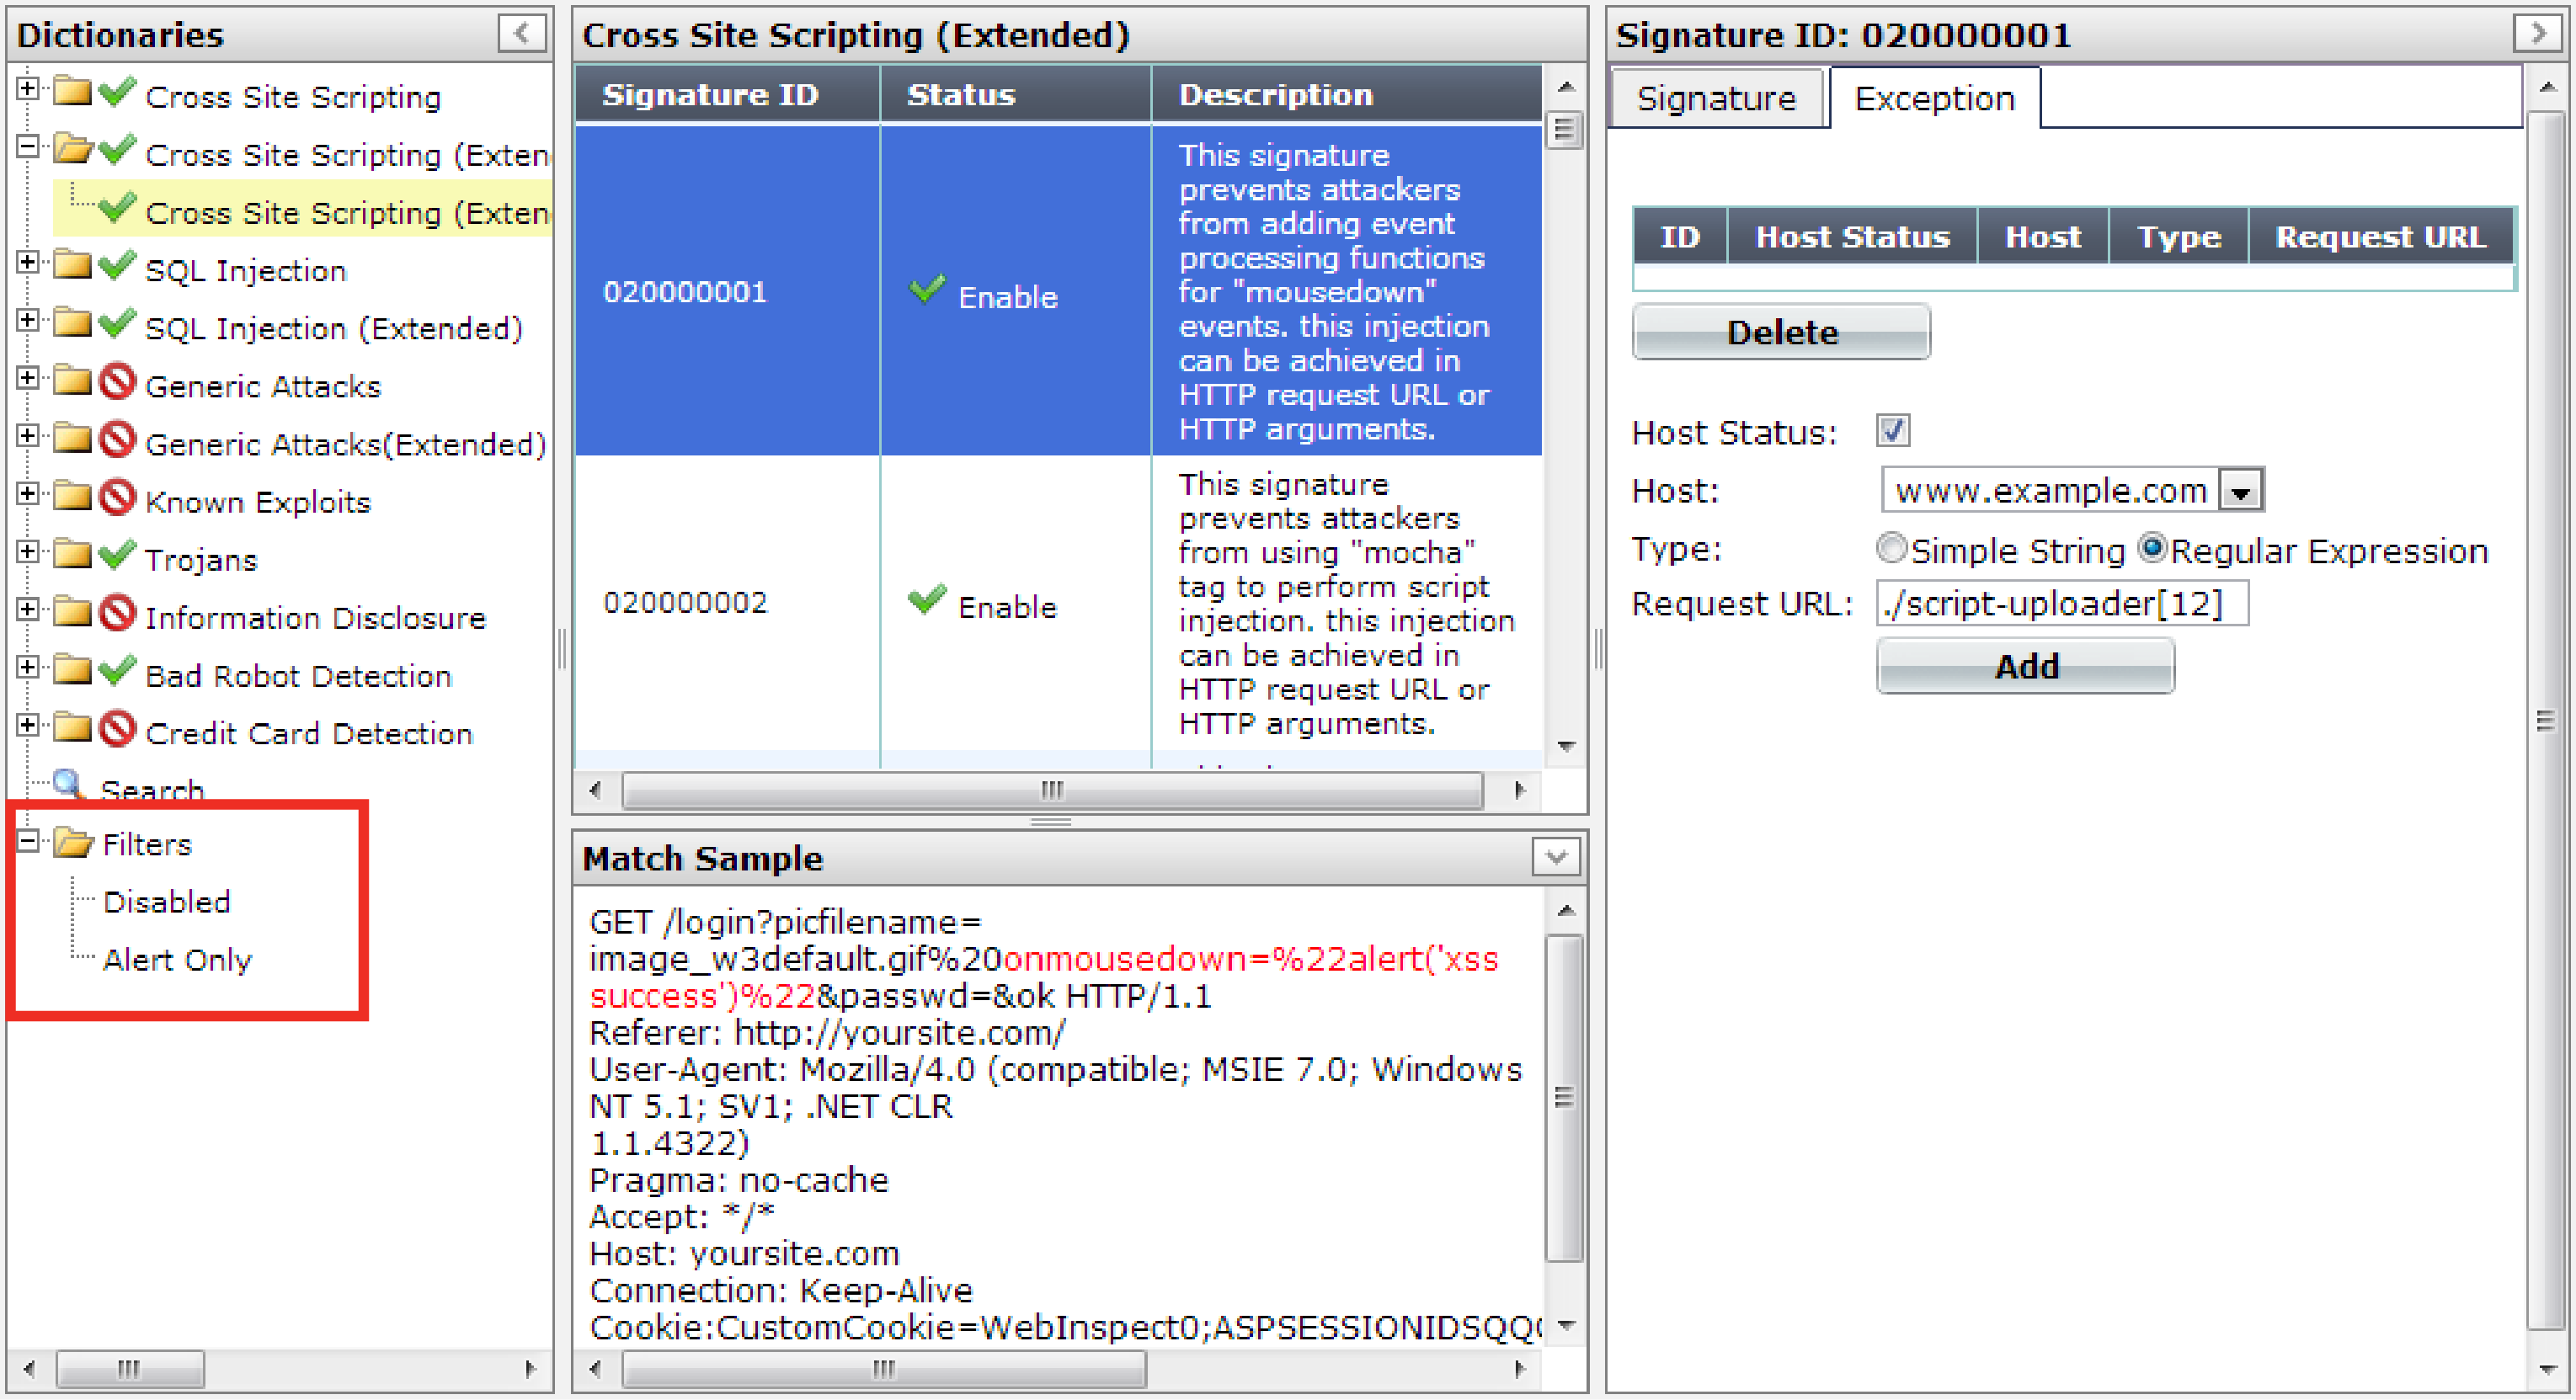
For example, to display a list of all signatures whose Alert Only check box is marked, click the Alert Only item in the tree. You can then quickly unmark these check boxes for multiple signatures to begin blocking again rather than only logging.