How to use DIDO terminal connectors on FortiCam MB13 cameras
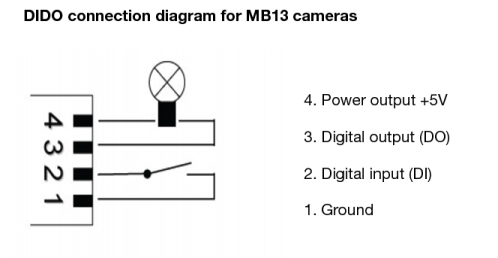
FortiCam MB13 (FCM-MB13) cameras come with Digital input and output (DIDO) terminal connectors. According to your configuration, a digital input can trigger the camera to record a video clip. You can also optionally connect other devices to the digital output, such as a relay to turn on/off another device.
To configure DIDO on MB13 cameras
1. Go to Camera > Configuration > Camera, select the MB13 camera from the camera list and click Edit.
2. Configure the digital input and output settings.Note that this setting is only available on FortiCam MB13 cameras. More cameras will support this feature in the future.
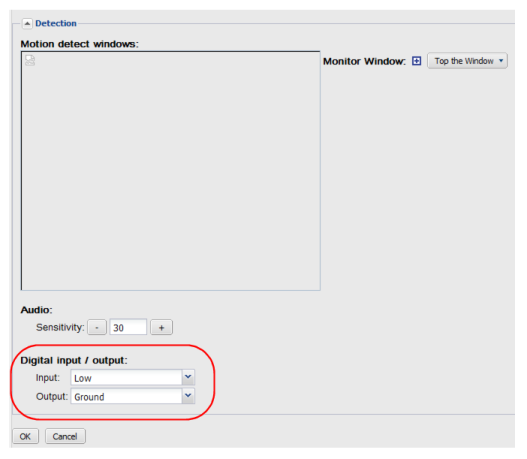
The digital input can be configured to trigger when the signal is:
• LOW (ground)
• HIGH (+5V)
• Rising (transitioning from LOW to HIGH)
• or Falling (transitioning from HIGH to LOW)
If not connected, the camera will see the digital input as HIGH.
The digital output can be configured to be either grounded or open when in the triggered state. When not triggered, it will be in the opposite state.
For example, if opening a door causes a sensor switch to open, then the switch could be wired between DI and ground. DI will be grounded (LOW) while the door is closed and will go HIGH when the door opens. DI could then be configured to trigger on the rising edge. When the door opens, DO would be set to its triggered state and a video clip will also be recorded.
Triggering on the rising or falling edge can be useful if the DI might be held in the triggered state for a long period. In the example above, if DI were set to trigger on HIGH and the door is left open for a long period then the camera would trigger repeatedly.
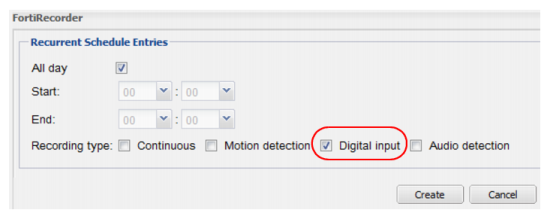
3. Go to
Camera > Schedule and enable
Digital input when you create a recording schedule.
The schedules will be used in camera profiles, which will eventually be used by the camera settings. For details, see
“Camera configuration workflow” on page 36.