Creating the FortiGate RADIUS SSO agent
Once you define a RADIUS SSO (RSSO) agent, the FortiGate unit will accept user logon information from any RADIUS server that has the same shared secret. You can create only one RSSO agent in each VDOM.
Before you create the RSSO agent, you need to allow RADIUS accounting information on the interface that connects to the RADIUS server.
To enable RADIUS access on the interface - web-based manager
1. Go to System > Network > Interfaces and edit the interface to which the RADIUS server connected.
2. Select Listen for RADIUS Accounting Messages.
3. Select OK.
To enable RADIUS access on the interface - CLI
In this example, the port2 interface is used.
config system interface
edit port2
append allowaccess radius-acct
end
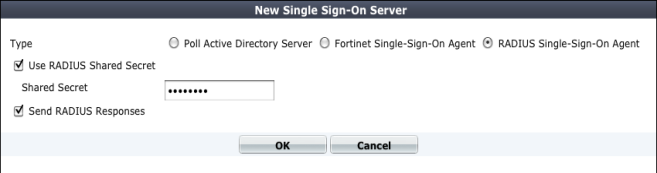
To create a RADIUS SSO agent
1. Go to User & Device > Authentication > Single Sign-On and select Create New.
2. In Type, select RADIUS Single-Sign-On Agent.
3. Select Use RADIUS Shared Secret and enter the RADIUS server shared secret.
4. Select Send RADIUS Responses.
5. Select OK.
The Single Sign-On agent is named RSSO_Agent.
To create a RADIUS SSO agent - CLI
In this example, the RADIUS server secret is “fortinet”.
config user radius
edit RSSO_Agent
set rsso enable
set rsso-validate-request-secret enable
set rsso-secret fortinet
set rsso-radius-response enable
end
When the RSSO agent is created in the web-based manager, it is automatically named RSSO_Agent. You can use any name when creating the agent in the CLI.