Figure 197: Report schedules page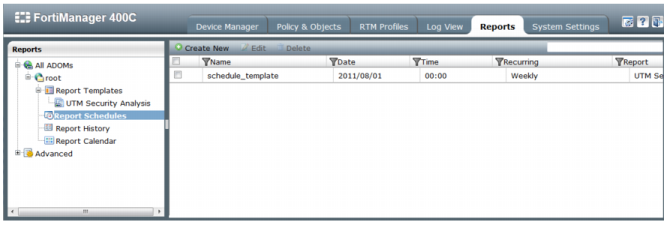
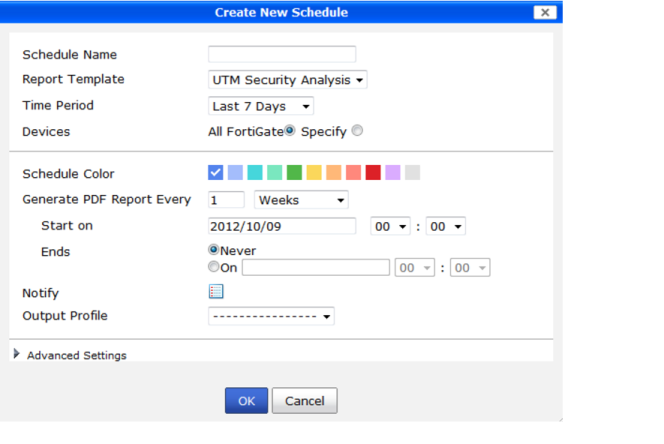
Schedule Name | Enter a name for the report schedule. | |
Report Template | Select the report template on the drop-down menu. To create, clone, or edit a report template, go to Reports > All ADOMs > root > Report Templates. | |
Time Period | ||
Devices | ||
Schedule Color | Select a schedule color. The schedule color is reflected on Report Calendar and can assist you to quickly identify scheduled reports. | |
Generate PDF Report Every | Enter a numerical value and specify hours, weeks, days, or months. Select On Demand to generate the report only when required. | |
Starts on | Select the date and time to start the report schedule. | |
Ends | Select the date and time to end the report schedule. Select Never to create a recurring report schedule with no end date. | |
Notify | ||
Output Profile | Select the Output Profile for the schedule from the drop-down menu. To create a new Output Profile, go to Reports > Advanced > Output Profile, and select Create New. | |
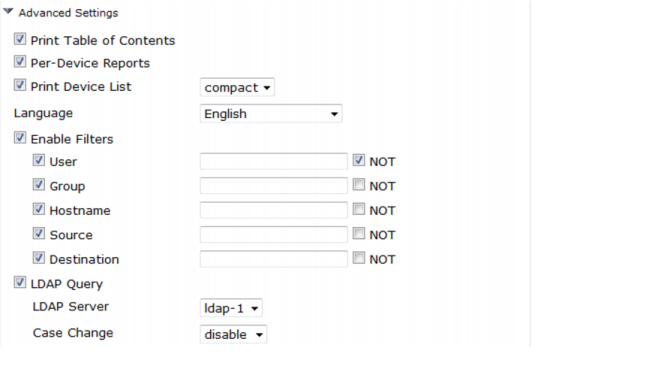 Advanced settings
Print Table of Contents | Select the check-box to enable. The report will include a table of contents. | ||
Per-Device Reports | Select the check-box to enable. A separate report will be generated for each managed device. | ||
Print Device List | Select the check-box to enable. Select compact, Count, detailed, or none on the drop-down menu. Compact: Display a compact comma-separated list of device names included in the report. Count: Display only the number of devices included in the report. Detailed: Display a table of device information for each device included in the report. | ||
Language | Select the report language from the drop-down menu. The default report language is English. | ||
Enable Filters | Select the check-box to enable. | ||
User | Select the check-box to enable. Enter a User to filter the report by this value. | ||
Not | Select the check-box to exclude the User specified from the report. | ||
Group | Select the check-box to enable. Enter a Group to filter the report by this value. | ||
Not | Select the check-box to exclude the Group specified from the report. | ||
Hostname | Select the check-box to enable. Enter a Hostname to filter the report by this value. | ||
Not | Select the check-box to exclude the Hostname specified from the report. | ||
Source | Select the check-box to enable. Enter a Source IP to filter the report by this value. | ||
Not | Select the check-box to exclude the Source specified from the report. | ||
Destination | Select the check-box to enable. Enter a Destination IP to filter the report by this value. | ||
Not | Select the check-box to exclude the Destination specified from the report. | ||
LDP Query | Select the check-box to enable. | ||
LDAP Server | Select a LDAP server on the drop-down menu. | ||
Case Change | Select disable, upper, or lower on the drop-down menu. | ||