How to set up your FortiADC : Connecting to the web UI or CLI
 
Connecting to the web UI or CLI
To configure, maintain, and administer the FortiADC appliance, you need to connect to it. There are two methods:
Web UI — A graphical user interface (GUI), from within a web browser. It can display reports and logs, but lacks many advanced diagnostic commands. For usage, see “How to use the web UI”.
Command line interface (CLI) — A text interface similar to DOS or UNIX commands, from a Secure Shell (SSH) or Telnet terminal, or from the JavaScript CLI Console widget in the web UI (System > Status > Dashboard). It provides access to many advanced diagnostic commands as well as configuration, but lacks reports and logs.
Access to the CLI and/or web UI through your network is not yet configured if:
you are connecting for the first time
you have just reset the configuration to its default state
you have just restored the firmware
In these cases, you must initially connect your computer directly to FortiADC, using the default settings.
 
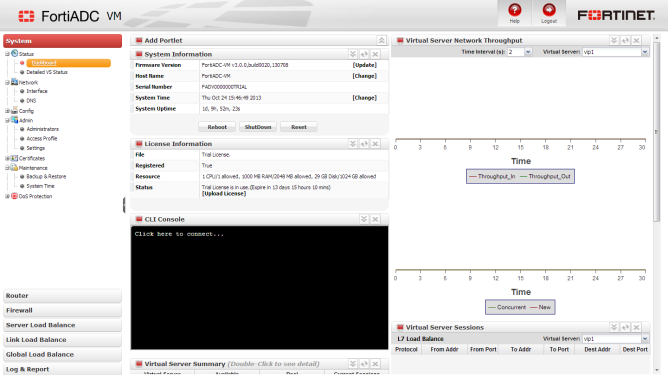
If you are installing a FortiADC-VM virtual appliance, you should have already connected if you followed the instructions in the FortiADC-VM Install Guide. If so, you can skip this chapter and continue with “Changing the “admin” account password”.
Via the direct connection, you can use the web UI or CLI to configure FortiADC’s basic network settings. Once this is done, you will be able to place FortiADC on your network, and use FortiADC through your network.
 
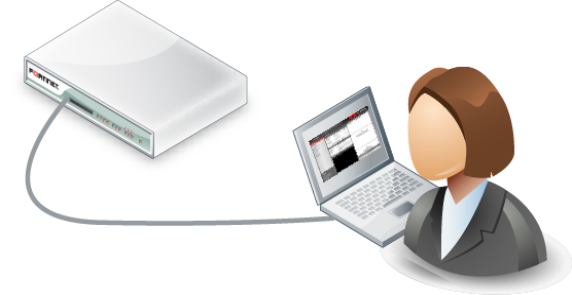
Until the FortiADC appliance is configured with an IP address and connected to your network, you may prefer to connect the FortiADC appliance directly to your management computer, or through a switch, in a peer network that is isolated from your overall network. This will improve security during setup. However, isolation is not required.